 One of my sister's granddaughters is scheduled for surgery soon. Because it's going to be a rather long recovery, I wanted to send her some activity books and markers. I picked those up this afternoon, and on the way home I had an even better idea: make her a colorful pillowcase to brighten her hospital bed.
Since I was making the pillowcase anyway, I thought I'd write a tutorial. This is a perfect first sewing lesson for a young person or someone who wants to learn how to sew. The seams are all straight and long: perfect for practicing.
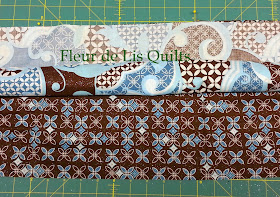
Let's get started. Begin with two coordinating pieces of fabric. I used a standard pillowcase to get my finished measurements (20 x 26). This means that the two pieces will measure twice that: the main fabric (41 x 46) and a coordinating casing (11 x 41).
Lay the smaller piece down with the right side facing up. Place the main piece of fabric on top right sides together (matching the 41 inch sides). Pin the edges together. Now to bury the seam inside of the casing, roll the large piece up toward the pinned edge. When you've reached the seam, turn the first piece up and over the roll to match the seam. Pin it in place and you're ready to sew.
I made two seams, one 5/8th inch from the edge and another just inside the first seam. This pillowcase is going to a child and may see a few pillow fights. I want it to hold together.
Once the seam is complete, you need to get the pillowcase out of that casing. It's easy, really, just turn the casing as you normally would. It's plenty large enough to turn it by hand. These two pictures show my pillowcase turning at the beginning and about half way through the process.
Once you've turned the casing right side out, press it flat. The fold the pillowcase in half right sides together. You have only two edges to sew: along the side and the bottom. Again, I made two rows of stitches so that the pillowcase would be extra sturdy.
Then turn the pillowcase right side out and you're done.


No comments:
Post a Comment
I read every comment and will visit your blog. Responses to questions and comments will be here, so come back for answers and let's have a conversation. You get the next word!