Saturday, July 23, 2011

AAQI again

Here's another little quilt for AAQI (Alzheimer's Art Quilt Initiative) that I made yesterday.  I think I have five completed now.  I hope to complete one more before sending the set off to AAQI.  
I do have to label them all and register them on the AAQI website.  I plan to do both of those this week while at the workshop.  I'll have evenings in a hotel with little to do, and since I'm not much for watching TV unless there's something else to do, I may get rather bored rather quickly.

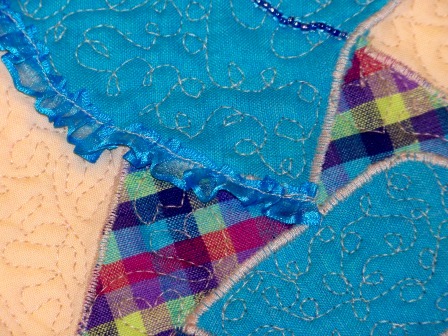
This little darling is Sunbonnet Sue dressed in blue.  I did a very tight micro-stippling on the entire quilt, which took much longer than I expected.  Her bonnet is stippled in swirls and her dress is stippled in hearts. She's wearing lace around her bonnet and at the hem of her little plaid dress.  Isn't she just sweet?

Check out her bonnet.  There's a row of blue seed beads on the crease of her bonnet and a little mussie tussie of flowers on the back.
I'm hoping that there's someone who would love a miniature quilt with a cute little girl who happens to be very traditional.  I'm also hoping that that someone is willing to pay a nice little sum for said little quilt to help support the AAQI.

What do you think?  Won't this little girl help the good cause?


Friday, July 22, 2011

Make Your Own Turning Organizer

I recently made this neat little turning organizer to hold my zippers.  I've been storing them all together in a plastic container but there are too many to have to sort through them each time I need a zipper.  I'd been thinking about items to purchase that would allow me to sort the zippers by either size or color.  Since I keep only basic white, black, natural, and navy, I knew I needed something that would allow me to sort into at least  four types.   Some time ago while trying to find a zipper, I separated the zippers by color.  Since then, I've come to realize that this is a good system for me.  Generally the color is more important than the size since I can cut longer zippers down, if necessary.  This is not frugal, since longer zippers cost more, but it will serve in a pinch.

In the end, this is the turning organizer I  build.  Here's how I did it.
Supplies:
Crayola Air Dry Clay
4 plastic drink mix containers 
3/8 inch dowel rod
decorative papers
4 zip ties (8 inches or longer)
double stick tape
ruler
scissors
single hole punch
sharp knife or small hand saw to cut the dowel rod
I also used my rotary cutter with a used blade to cut the paper.  However, you can use scissors.

Begin with the clay and form a base for the organizer.  I didn't worry about making it especially even, although I tried to make it look okay.  My form is about 1 1/2 inches from top to bottom at the highest point, which is in the center.  Once the shape is formed, find and mark the center of the form.  Make a hole in the center by pushing the dowel rod straight down from the mark you made through the base.  


When you slide the dowel rod out, you will have to smooth the clay down around the edge of the hole.  Use the knife or the handle of the hole punch to cut the hole larger on the bottom of the base.  I opened the hole about 1/4 inch all around and about 1/4 inch deeper.
Set the clay aside to begin drying.  This may take 2-3 days depending on the thickness of the form.


My form was based on a wooden base used for a rotating picture frame.  The two are in this photo so that you can get an idea of what I was aiming for.  Forget the pretty little ridges and the perfectly symmetrical circle....I knew neither of those would happen!  But this is not an organizer for sale.  It's meant to hold my stuff and I don't need perfection in this way.  You, however, are welcome to stress over perfection.  I'll just move on.


Now you're ready to begin working on the plastic containers.  First cut and remove the paper that is on the container, then remover the adhesive that is generally gummed up on one side of the plastic.  


Measure your container from the top just below the tiny lip to the bottom.  To measure the circumference of the container, wrap a piece of paper around the outside and overlap it by a half inch.  My containers are 6 1/2 inches tall and 9 inches around.  Mark and measure your decorative papers to fit the container.  Cut the paper out and wrap around the container, using the double stick tape on one edge to secure.  Repeat to cover the other three containers.  


Now use the hole punch to punch two holes in each container.  One hole should be directly over the overlapped paper and the second should be about one-half inch away.


Slide one of the zip ties through both holes of each container.  From the outside side the tie into the cup and then back out.  Repeat to add the remaining three cups onto the zip tie.  


As you add the cups, the space between them will naturally get tighter.  Roll the cups inward to be able to zip the tie closed.  Do not zip tightly just yet.  Set the cup aside and work on the dowel rod.


Use your knife or small saw to cut the dowel rod down to 11 inches.  You will want a way to keep the dowel in the base.  Use the lid from the container to make small washers.  Draw and cut three small circles on the lid and cut out using the scissors.  Repeat with another lid so that you have six circles.  Use the hole punch to punch out two or three circles in the middle then use the scissors to round out the center.  


You will also need a way to hold the containers up off the base once they are put on the dowel.  Use the two remaining lids to make larger washers for this.  Cut the lip off the lid and use the hole punch to make a hole as close to the center as possible.  Now use the scissors to enlarge the hole so that the dowel will just fit inside.  Because none of the washers will show, don't worry about cutting perfect circles.  


 Put the six small washers on one end of the dowel.  Under the washers add a zip tie and tighten as much as you can. 

Slide the dowel onto the base and carefully push until the washers and zip tie are sunken into the clay.  If necessary, enlarge the hole you made earlier using a knife point.


Set the base down and carefully push the two larger washers on to the dowel from the top.  Add the cups so that you can judge about where the washers should be.  The containers will sit on the washers.  I allowed about an inch and a half from the top of the containers to the top of the dowel.  Once you determine where the washers go, remove the cups and add two zip ties--one below and one above the plastic washers.  


Now you're ready to add the containers to the dowel rod.  Slide the containers on to the dowel from the top and set on the washers.  Tighten the zip tie so that the containers sit straight.  And you're done!


Note: A few days after making the organizer, I was going to paint the base and dowel but found that the dowel rod could wiggle in the base.  This could be due to the clay shrinking as it dried or from my moving the dowel as I was building and taking photos.  To resolve the problem, I added more clay to the top of the base and smoothed it down pushing some into the tiny crack around the dowel.  I allowed this to dry another two days before painting the base and dowel to match my decor.

Thursday, July 21, 2011

Southern Pecan Pralines

Before I tell you how to make pralines, I think I owe you the story behind the recipe.  Every year for Christmas my dad would make these wonderful pecan pralines. 
It was a huge deal at our house.  Everyone pitched in to pick and shell the pecans.

When there were enough for "pecan candy," as my dad called it, he would put the big black iron pot on the stove and begin pouring in all sorts of sugars and butter and canned milk. Then the stirring began.

We each took a turn at stirring, but now I realize that it was only so we felt that we were a part of the process.  The candy in the pot is cooked at boiling temperatures and should it splash or splatter on hands and arms, it continues to cook and burn until cold water washes  it off.  That rarely ever happened, since daddy picked up each of us and allowed us to stir.

We'd give a big effort of stirring the pot of bubbling sugars squealing with delight. He'd set that daughter down and pick up the next one, each in turn so that everyone had a chance to stir.

At some point we were shooed out of the kitchen so that he could get to the serious business of stirring the caramelized sugars to keep the candy from  sticking or overcooking.  Once the candy was just the right consistency, he poured in the vanilla and pecans, stirring fast and hard to mix it all up, and then carried the hot pot to the counter or table where mom had spread out some waxed paper.

Together they ladled out the candy onto the paper to cool and harden.  We stayed close enough to smell the delicious concoction and perhaps get a finger into a dripped bubble, but far enough away so as not to be dripped on. 

Oftentimes, as sisters grew up and joined the service, their candy was bagged while still warm to insure that their care packages included the candy.  Now that grandchildren are away at college or stationed in some remote area as military personnel, we make candy to ship to them.

Over the years we've sent pecan candy to Germany, Iraq, Turkey, Afganistan, Guam, and all over the U.S.  And those are the places I can think of easily. Mom and dad sent candy and care packages around the world having had five daughters, as many sons-in-law and even more grandsons in the military.


So, mix up a batch of pecan candy, but get everyone in the house involved with the stirring.  You'll be glad for the assistance, and they'll have one more family memory to share.

Bourque Family Pecan Pralines
1 stick butter or margarine
3 cups white sugar
2 cups brown sugar
2 cans evaporated milk
2 teaspoons vanilla
1 pound pecans (chopped, whole, or ground)

Melt butter in heavy pot or dutch oven. Add sugars and evaporated milk and cook at hard boil until reduced to thick syrup.  Stir continuously to keep from sticking to pan or burning.  May take 45 minutes to a hour.  Use a candy thermometer, if necessary, to register between medium ball stage and hard ball stage, or drop teaspoon of syrup into cup of cold water.  At soft ball stage the syrup will roll up between your fingers when you handle it in the water.  At hard ball stage the syrup will clump up in the water and easily roll into a ball between your fingers.  As you become more adept at making the candy, you will be better able to tell the correct stage.  When at the soft ball stage add the pecans and cook for 2-3 minutes. Stir continuously until all pecans are coated. Remove from heat, add vanilla and stir quickly. 

Drop by tablespoons onto wax paper to cool.  Get a partner to help drop the candy onto the papers as it is crucial that it all be dropped before cooling in the pot.  If this happens, you can reheat the pot and candy to melt the sugars, but candy will be harder upon cooling.

If you give this recipe a try, let me know how it works for you.

Monday, July 18, 2011

Etsy Shop Profile: Lambs and Ivy Designs


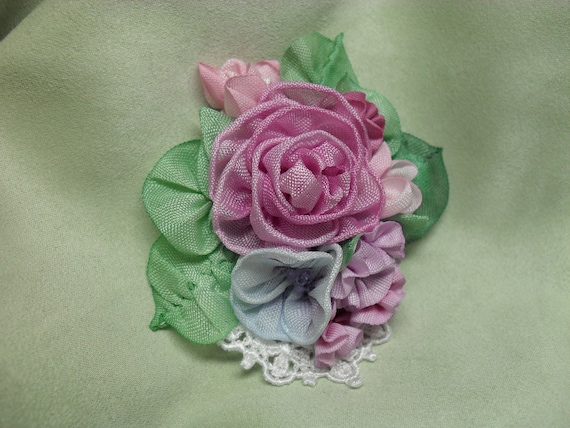
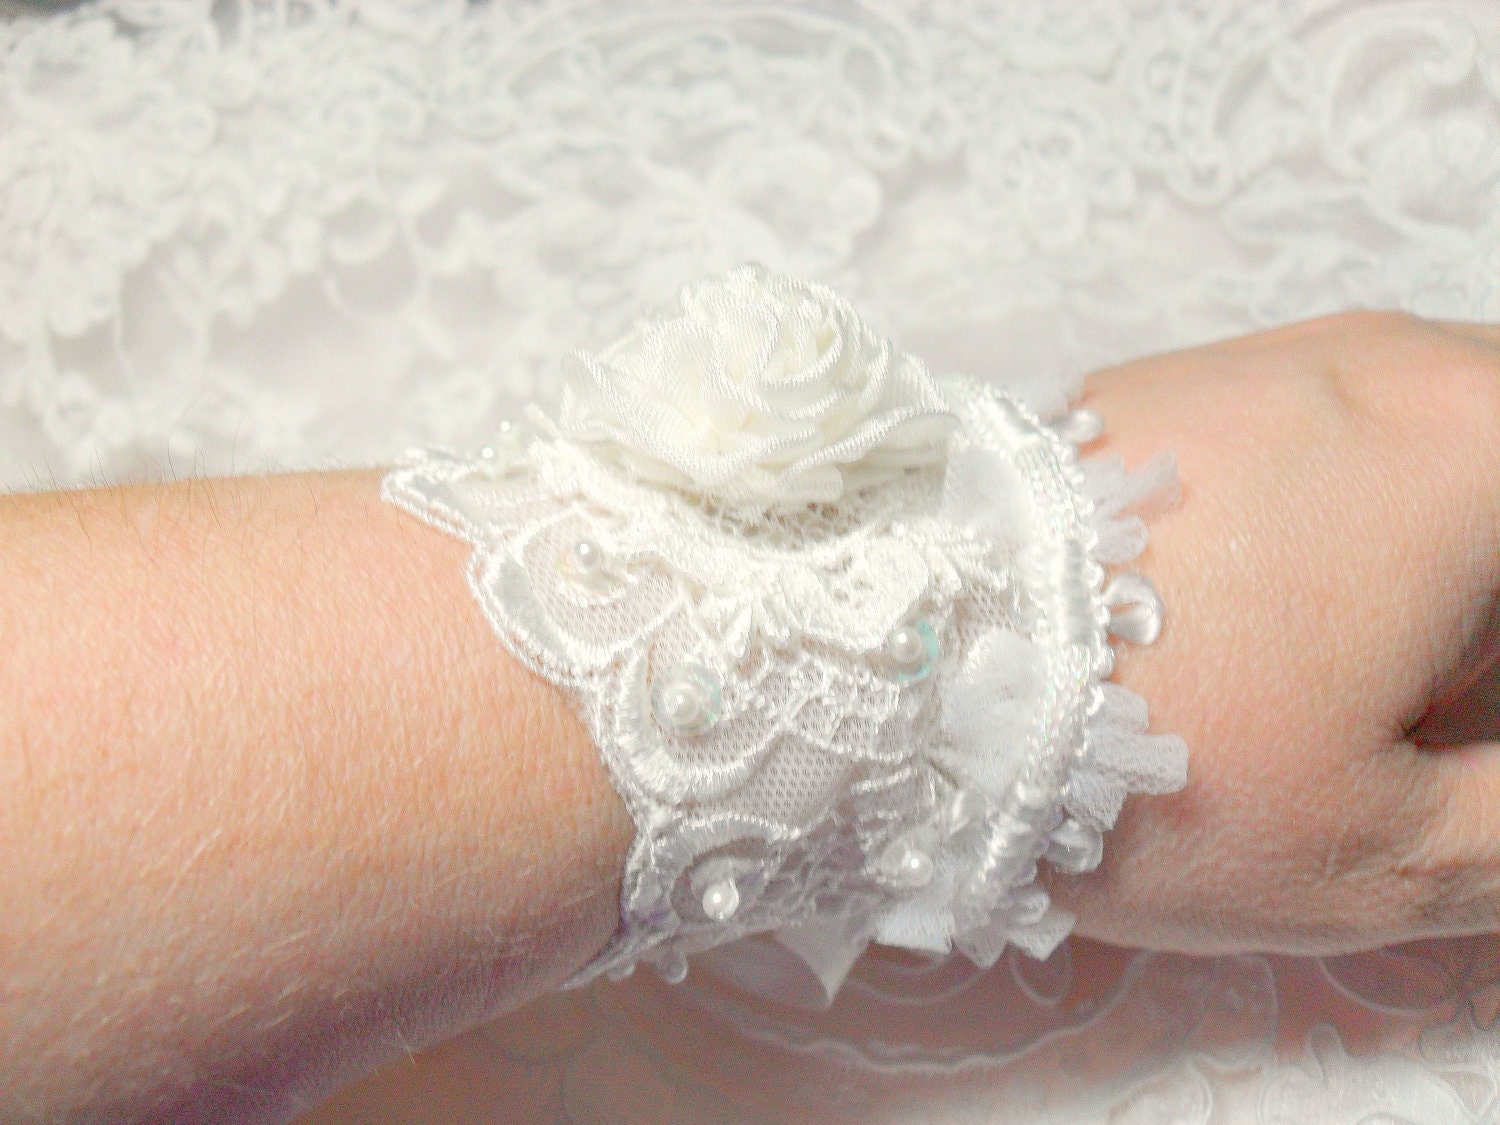
A few weeks ago I had the honor of meeting Dana through the Etsy Blog Team.  She's a designer from Atlanta, Georgia, who creates delectable ribbonwork by first hand dying silk ribbon and then shaping them into flowers, leaves, and bud to make cuffs, chokers, and embellishments for a variety of uses.  After spending a little time in her Etsy shop, I just had to interview her for a feature.


Ribbon flower pin brooch   hand dyed  ribbonwork rose  flowers
My plan was to have her feature up last Friday, but well, things happen....sisters come for a visit, surgeries are scheduled, and life moves at impossible speeds.  So, here we are, finally, with a wonderful interview in which Dana tells us a little about herself.  I'm sure you'll come away wanting to know more about her, but then you'll have to venture those questions yourself.  You can do that by visiting her Etsy shop here.

1. Where/when did you learn to make such beautiful lace flowers?   
My mother and I owned an antiques store. Antique ribbonwork is hard to find, expensive and often too damaged to use. I really just taught myself to do it out of frustration in not finding enough antique flowers. 

Velvet strawberry pin brooch fasinator  ribbon flowers ribbonwork hand made one of a kind
My favorite....check out those strawberries!

2. What are some of your favorite flowers to make?  My favorite flowers are roses. I love all shades of pink. I also love purple violets.


3. How would you describe your creative process?   My creative process? Well,... a mess.Ribbons, needles, pins everywhere. I blame this on my mother.What kind of mother lets a child have an indoor sandbox? LOL!


4. What are some unconventional ways that you've used the flowers?  My flowers really get around. One customer uses them on her diabetes pump! I have made pieces for lamp shades, pillows, crazy quilts, dolls and lots of Marie Antoinette and fairy themed items.


5. You have some wedding themed items. Do you have plans for more?   I love weddings. I get very stressed when doing weddings. I want things to be perfect for the bride! I am in the process of adding flower girl tiaras.


6. Is there anything else you'd like others to know about yourself or your shop?  I love my customers. I never get tired of seeing all of their ideas and I love when they are in love with a piece.I am very blessed to do this.

Ribbon flowers applique fasinator brooch pin ribbonwork  pink yellow
See what I mean about wanting to get to know her and see more of her work?  Isn't it just stunning?  Leave a comment and say hello to Dana.  I'm sure she would love to hear from you!  You can visit Dana's blog at http://lambsandivydesigns.blogspot.com/ or her Etsy shop at http://lambsandivydesigns.blogspot.com/.  I promise you won't be disappointed!

Sunday, July 17, 2011

Toys of the Rural Life Museum

Chairs of all shapes and sizes but many are just right for
a child. 
This is our final visit to Baton Rouge and the Rural Life Museum that is part of the LSU campus.  On the grounds are beautiful gardens with many variety of roses, camellias, and other shrubs.  Beyond the gardens are small fields of a variety of farm crops.  These are used for teaching and field trips.


A doll carriage made of wicker
Once inside the museum, visitors can choose to view a variety of vintage and antique artifacts: buildings and barns, buggies and cars, and much more.  


Some of the dolls and toys in a glass case.  Check out the doll quilt!
Today's post is about the toys in the collection. Toys have always fascinated me.  I enjoy looking at old toys and finding the details and minute intricacies of the toys of yesteryear. 
On the left a silver stove with tiny pots.  On the right a black
wrought iron wood stove also with wrought iron pots.
Behind it a large paper doll.
A doll surrounded by a doll bed, cradle, and other toys.

Two baby dolls and in front of them arms and legs from porcelain dolls.

The back of a chest and several doll heads, busts and bodies.

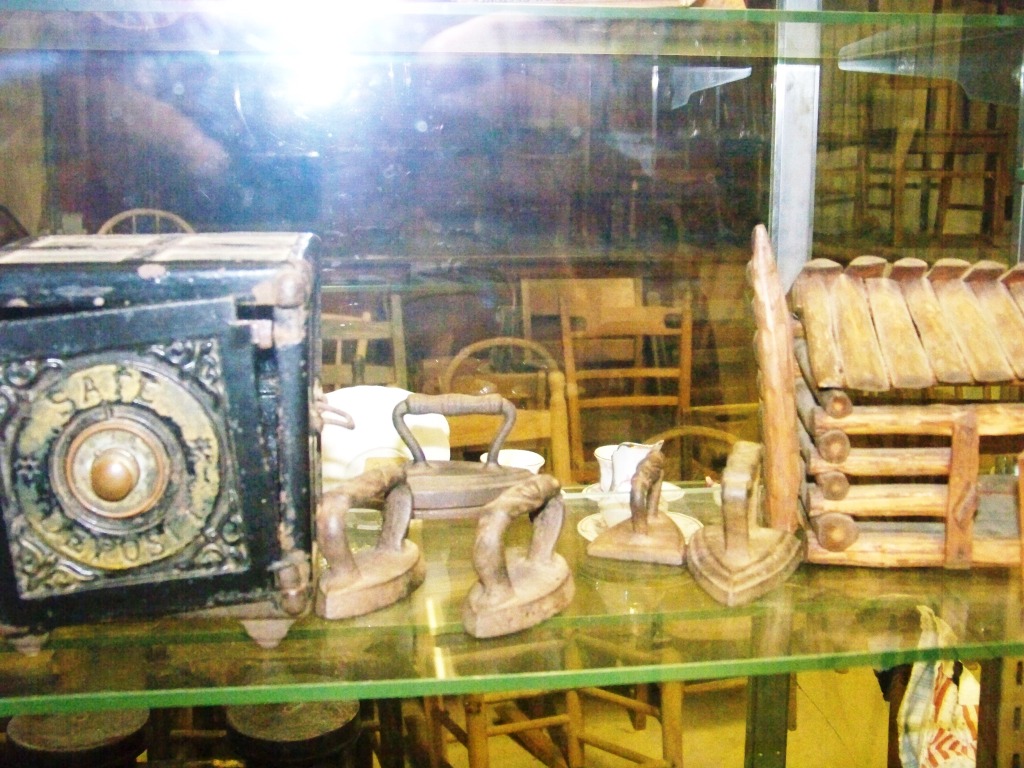
Toy irons that probably really worked and a toy safe on the left.  On the right a log cabin.
  Before closing, I think you'll probably enjoy seeing one or two more photos.  
A camera
A doctor's exam table
Hope you enjoyed our visit.  Leave comments and tell us what you think.

AAQI cubed

Yes, that's right, cubed--as in three quilts ready to send off to AAQI!  I am rather excited because I had hoped to complete three and have met that goal.  Of course, I'm not going to stop just because I got there.  Instead, I'll keep going.

I have an idea or two percolating in my head that I want to try.  Besides, I sort of cheated with this quilt....I used a block from a project that I'd long ago given up on.  I was supposed to make a few pot holders with them but poor darlings are UFO's twice!

Isn't it just like me to quit a project, come up with another way to use some of the blocks, then quit that idea before I even get started on it?

Oh well, that's how it goes.  Once I put something aside, it's very unlikely that I'll come back to it.....ever!  Here are a few pictures.  Since it's so simple, I'll just let you draw your own conclusions about the little quilt.  Enjoy, but don't forget to let me know what you think of it.


Wednesday, July 13, 2011

Back to the Rural Life Museum

I really don't have much to post today.  Richard and I spent the morning painting the studio, then I spent the afternoon straightening up the fabric stash.  Both certainly do look much better.  I'm not posting pictures, though, you'll have to wait a few more days before seeing the finished product of all that work.  


Farm wagon for hauling hay or cotton.
I do have some photos, however.  These are from our trip last week to the LSU Rural Life Museum in Baton Rouge.  Most of them deal with transportation in some way.  


The museum has everything from wagons to buggies to the first automobiles.  Although there are many more wagons and buggies in the museum, I took photos of the more interesting ones only.  Well, the ones I found most interesting, anyway.


I still have another set of photos and will eventually post those but I make no promises as to when.  My sister from Maryland is coming home in the next day or two and I want to spent time with her this weekend. 


Because her husband is in the military, we don't get to see her nearly as often as we'd like.  In fact, the last visit we had was when Momma died in November, so this is a special visit for us.  I'm excited to see her and spend time with my family.
Hearse with casket inside.


Another very ornate hearse with casket.
That's also a casket under the hearse.  Can you see the glass front?

Woman's side saddle.  She sat with her right leg hooked
on the top pommel and left leg hooked on the lower pommel.
Because both pommels are facing up, I can tell you that this
saddle is not made for jumping.  It would have been used for
pleasure riding or for long distances so long as danger was
not anticipated.

Wouldn't you just love to sit this saddle?  I would like to see how long before I start whining that my legs hurt.  I'm guessing I could handle about five minutes.  Yes, I've ridden a horse before.  In fact, I had my own horse once--Miss Kitty, named after the bar owner in "Gunsmoke."  


English sidesaddle for pleasure riding.  Note that
only one pommel shows.  This one is turned
the opposite way from the previous photo.  The lady still
sat facing the horse with both legs over the horse's left shoulder.
We rode astride, meaning a normal saddle and I loved to run in the pasture.  Otherwise, Miss Kitty was a pretty rough ride.  I imagine that sitting on a side saddle would have been thoroughly miserable on Miss Kitty.  


Know what keeps a lady from falling off one of these saddles?  Herself!  A side saddle made for jumping, running or galloping has the lower pommel turned down.  The rider fits the right leg as she would on this saddle, but the left foot goes into the stirrup and her leg goes under the pommel.  


The pommels are shaped to sort of wrap half way around the leg just above the knee so that when she sits just right, they give her something to hold onto with her legs.  


Very fancy buggy.  Check out the lanterns and the fancy seat.

This is the inside seat of the buggy at right.
It looks quite comfy, considering.  Notice
that the walls and doors are cushioned
and covered in leather.

I'll call this the dashboard of the same
buggy.  It's the inside on the front of the cab.
There are handles, a glass windshield
 and small storage box for papers and such.  

A two seat buggy.  Again, well cushioned with leather seats,
but no protection from the elements.


I'm pretty sure that I've told you everything I know about saddles and riding.  I just hope you made it this far and I didn't bore you away to another blog!


Don't forget to vote in the upper right hand corner.  Time is running out!