Showing posts with label tutorials. Show all posts

Saturday, December 21, 2019

Flying Monkeys ... a costume tutorial

How to make a Wizard of Oz inspired flying monkey costume ... with pictures and directions. Leave the wings off, add elf stockings and, yes!, you have an elf costume! (Directions in red are suggested changes for an elf costume.)

Supplies: shirt, white and red felt
Cut the bottom four inches off the shirts.

(Use a green shirt or change the colors as you'd like for the elf.
Don't cut the shirt at all and you can make the design longer for more color.)

I have one of those friends who signs me up for stuff. And then she tells me about what I am going to do. Then we walk away. 

Make a pattern
cut out the red fabric
(cut two per shirt)
Cut the white fabric adding
1/4" outside the pattern
(cut two per shirt)

Things can be going smoothly, and I get a phone call that reminds me that I was going to do something but I haven't done it. Yet.


Pin the pieces, red on top of white, and pin well.
Cut the tee-shirt between the pattern pieces and sew.

(Create a smaller design to go around the 
bottom of the shirt and don't cut it.)
You know what happens next? The deadline looms.


After sewing, trim off the neckline
and sleeves to make into a vest.
I have to get busy. But this time I got sick. Really sick. Two days in bed sick. The deadline looms ever closer. Get busy and work fast. At least this was easy. 


Cut pattern on paper (I just winged it.)
Cut out on brown felt. Sew to center back of shirt.
The black lines show where to overlap and sew or safety pin.
(No need to bother with wings for the elf.)
So flying monkeys have wings. I tried but failed. Horribly. I won't even tell you my plan. Here's what ended up happening: Using black felt, we cut wing shapes and safety-pinned them to the backs of the shirts. Later we'll use school glue or Mod Podge to make them stiff so they will stay open. I so wish I had pictures!


The hats, however, I nailed! I used the bottoms of the tee-shirts to cover recycled butter bowls. The decorations on the hats sort of match the vests. I just decided to go with a quirky almost matching design. Oddly, it worked once it was on the hat. My own pattern, I promise.
(Directions are for a pill box hat, in which an elf would be extra cute.)
Make a quirky pattern and cut out the red felt.
Cut the white felt 1/4" larger.
Sew on the knit 
you cut off the bottom of the shirts
Measure
the knit using the bowl and cut 
Staple the bottom of the bowl with the knit wrapped around the cut edge.
Gather the top and knot off.

I wrapped the blue knit around each bowl individually to get measurements. To wrap each bowl, I slipped the knit around it and folded the bottom edge to cover the opening and stapled all around. I recommend really cheap, thin bowls as they are easier to staple.


I gathered the top by sewing around the edge in a large running stitch, pulled it tight and made a knot. (See the hat on the top of the stack in this picture.) 
And that was it.

Flying Monkey suits. 
Three in an afternoon. Check!

Saturday, December 14, 2019

Christmas 2019: A TREE


I have not been doing much crafting. Or sewing. Or quilting. However, before leaving for Disney I made a couple of decorations for the tree. They are simply strings of large beads on a very thin wire. I added skinny ribbon to hang them on the branches. 

I really like them. They aren't showy like most ornaments, but they are pretty. I hung each one on a branch so that it dangles freely any time the tree moves, which is when the tykes are here. That's been a few days in the last two weeks.


At nap time in Deedee's house everyone sleeps in one chair.
Speaking of the tree, it looks pretty good this year. I've decided that the trick is to fluff the branches and hang lots of ornaments. Lots. Just keep adding. My angel topper did not survive summer in the attic, so I made a topper with some red ribbon I bought in the after-Christmas sale last year. 


Since putting up the tree, I've cleaned the attic. Right? Cleaned. The. Attic. It was a crazy afternoon of getting the Christmas stuff down, realizing how much other stuff was up there and just jumping on another project. Right now, there are no boxes up there. And it's swept! Clean. Like. Never. Before. (Sorry no pictures to prove it but it's real.) I think it's my gift to myself. Ha!


Among our other ornaments, I found these two ornaments that I made a couple of years ago. The mini Santa suit has five pieces, socks, hat, pants and coat. The tassel is made of crewel thread, sheer ribbon, beads all in red and a bit of gold trim. It's an easy ornament and you can find my tutorial to make it here. The tutorial for embellishing it is here. I'm guessing you have everything you need on hand. Am I right?

Tuesday, July 31, 2018

Zipper repairs -- a tutorial

I recently repaired this black leather coat that for our priest. Apparently while trying to unzip the inner lining, he caught the zipper head in the fabric and managed to pull apart the zipper tape and open the zipper head. 

In the end all I was able to do was to move the zipper head back to the beginning of the zipper then tighten it with a pair of pliers. The tape can't be repaired without interfering with the workings of the zipper. Luckily the area is about three inches from the closing end of the zipper, so he can still use the coat with the lining. 


 Repairing a zipper with pliers is easier than replacing one but it takes a gentle touch while squeezing the pliers in the right place. Tighten too much and the zipper teeth can't run through. Not enough and the zipper teeth won't close. And the zipper parts are small so they break very easily.

I tighten the zipper head in two places. In this case I tightened the slider window (see upper view). First I press the top board and bottom board together very lightly. (see the bottom view)

https://www.textileschool.com/261/
zipper-fasteners-on-garments/
Then I squeeze the two sides of the slider toward the center. By tightening the zipper head this way there is less chance of  breaking one of the parts. 

Zippers are tough but they take a real beating, especially as they get older. 

One way to help metal zippers slide smoothly and prevent them from getting sticky or rough, is to drip a little melted candle wax into the slider from the front, or throat. Be careful to avoid getting hot wax on the fabric. The wax coats the zipper teeth as it moves up and down. Add wax as needed to completely coat the teeth. Thick bees wax works best but I've used plain candle wax on my jeans zipper. 

Both zippers on the
jacket, notice how much
larger the outside zipper is.
Nylon zippers don't rust or get sticky, but they do like to get caught in fabric or loose thread. When this happens be extra careful not to jerk the slider. Instead try sliding it backward so that it moves along the same route of the fabric that is caught in it. 

If necessary, cut the fabric away and slowly pull it out a thread or two at a time. Yes, you have to weigh which is going to cost less in repairs, usually zippers are more difficult and time consuming. 

I cut loose threads as closely to the back of the slider as possible and then pull it out from the front of the zipper head. Yes, one thread at a time.

https://www.textileschool.com/261/
zipper-fasteners-on-garments/
Probably the best thing to do to save yourself from having to replace zippers, is to teach your children how to use them. Zippers need a straight, clear path. (I used a train metaphor with my boys.) Every curve and obstacle can derail the slider. And it can jump off the track more easily than children realize. It's possible to open the zipper head and feed the teeth back in then close it up again. However, that is a very delicate job so, if you find yourself having to do it, take your time, work carefully, and open or close the zipper head in minute amounts.

All opinions and instructions are mine. For more information on zippers, garments and other textiles, visit Textile School
(Warning: You may not be able to walk away.)

Thursday, April 12, 2018

Pin It Weekly #241 A Tutorial of Sorts

Have you been on your Pinterest lately? I really haven't in the last few days, but I discovered a nice little surprise waiting for me.


This is what my home page looks like, or maybe it's the header page. It's the one that shows up first when I go to Pinterest. But yes, surprised! Apparently Pinterest takes pins from your most popular board and throws them into these bricks or blocks. That's all I can tell you, but I like it. 

Other changes: the next thing I see when I scroll down is a continuous loop of my featured boards, which I chose many moons ago. But the big news is that after the featured boards Pinterest has a grouping of my latest pins, followed by a grouping of my latest boards. Note: everything here is arranged by the latest work you've done.

Then the regular grouping of boards appears. But it's possible that Pinterest is keeping track of my more popular ones so those appear first.

And just like that I found the answer: click on Boards then click on the option box next to Sort Boards. Your choices are Last saved to, A to Z, NewestOldestDrag and Drop. Yay, finally an easy way to put boards into alphabetical order. (The librarian in me is thrilled.)

Just because I need something that makes it easy, I'm reviewing.

Those tabs right under your Pinterest name--
Overview...an overview of your work
Boards...all of your boards in the order you choose to arrange them. You have to be here to access Sort Boards (BTW drag and drop means you can arrange them manually) 
Pins...all of your pins, arranged by most recent
Activity..."These are all the Pins people saved from your site and linked accounts. This page is visible on your profile right now, but you can always remove it." Quote from Pinterest 
Followers...All the followers you have, plus a button for each that allows you to follow them back. Note: Clicking Follow means you follow all of that person's boards, but you can click on the name and follow only those boards you want.
Following...Every one you follow. Pinterest doesn't distinguish whether you are following all of that person's boards or just a few, but you can click on the name and find out.
Tries..."Pins you try live here
Add notes and photos to recipes you made, places you traveled and other ideas you tried"  Pinterest Quote
Think of this as a way of reviewing some of the pins you're interested in. For example, if you find a recipe and decide to make the food, you can come here and leave a note telling how it went. 

Believe it or not, there's still more, but my brain is packed and I'm a little under the weather. 

Happy pinning!

Sunday, November 19, 2017

How to Make Decorator Corners on Pillows Tutorial

Yesterday I promised to write a tutorial on how to create pillow corners so that the corners look square. They really aren't, but you'll see that in a moment. I'll assume that you've already sandwiched and quilted the front panel of your pillow cover and are ready to make the back and sew everything together.

Cutting the back panels
First determine the size you will need for the envelope backing.  Let's say you are making a 14" square pillow cover. Your back will need to be 14" in length. To determine the width, take that number (14") and divide by two (now you have 7") then add four inches (for a total of 11"). Cut two pieces of fabric 11" X 14". 

Let's do another one just for fun using 18" for the square pillow.
18 / 2 = 9 add the 4" overlap 9 + 4 = 13 so your backing panels will be 13" X 18".

Tip: You can use the same equation for any size pillow--just substitute the very first number (18 in this case).

Tip: I find that adding four inches works well, but you can make adjustments if you want more or less overlap. Keep in mind that more overlap makes getting the pillow form into the cover difficult. Less overlap will distort your pillow.

Hem the panels
Fold and press one long side to form a small ¼ inch hem, then fold and press again so the raw edge is completely enclosed. Sew your hem and repeat on the other 11" X 14" panel. In this next picture you can see how the panels are hemmed (blue arrow) and then placed on the pillow top.


Layer the pieces (RST)
You're ready to layer the pieces. Start with the quilted front of the pillow cover. Lay it down on your work surface, right side up. Place your back pieces so that the finished sides of seams are facing down and are in the center of the panel. In the picture above you can see how the sewn edges overlap each other in the center of the pillow cover. 

Mark the corners
Before you sew, you'll need to mark the pieces so that you can cut off a bit of each corner. A better way to explain this is to show you the outcome.


Notice how the purple and gold pillow has "bat ears" sticking out? The other pillow looks square. That's because I trimmed the corners to give it the illusion that it's square.


The way to achieve this look is actually quite easy. Begin at one corner of the pillow and measure ½ inch from the corner. Using a fabric pen, make a small dot. Now draw a line from the dot to about ¼ of the way toward the center edge like in the drawing. Draw lines on all four corners. Look at the photo below (yes, it's the same as above). You can see the drawn lines on each corner. Notice that I didn't draw lines all the way around the pillow. That's because I will use my normal seam allowance and don't really need lines. (Or maybe because I'm lazy.)


Sew
Sew all the way around the pillow cover, using the drawn lines as necessary in the corners. Just keep a ¼ inch allowance where you don't have lines.  Easy peasy! Tip: If you are using your home sewing machine, you should zigzag close to the straight seam to prevent raveling.

Trim

Once the seam is complete, trim the seam allowance to ¼ inch in the corners to make turning easier. Tip: Be careful that you don't cut the zigzag stitches.  


Turn and Press
All that's left is to turn the pillow cover right side out through the overlapped back. Be sure to push the corners out to get a nice, sharp point. A good steam pressing should do the trick to keep the seams nice and crisp.

Extra Tips!

When pressing the seams, try not to push down on the center of the pillow so the quilting will stay nice and puffy. 

This method also works for pincushions. Just be careful to adjust how much of the corner to trim down. Small corners mean less to cut off!


I sometimes sew and cut the corners just a hair more than ½ inch. It will bring the corners down and make them more square. Be careful, though, too much will give the corners a rounded look. This purple and gold one is a good example of that. 


Now it's your turn! Tell me about this tutorial. Is it detailed enough? Did you understand each part or is something about it confusing? Seriously, let me know if you would use it when making pillow covers. I've been thinking of writing a few more tutorials now that I have a little more time, so your feedback is important.

Tuesday, March 7, 2017

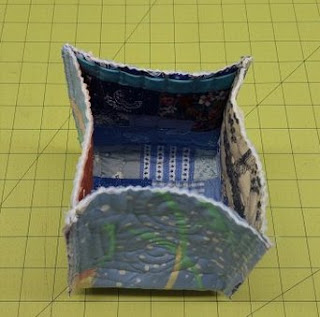
Quilted Scrap Basket ~~ Tutorial

I got a couple of emails asking me to expand on the idea I wrote about in the "Scraps into Buckets" post on Friday. So I thought about writing a tutorial. Be warned this tutorial is picture heavy and rather long. But I think I've included every detail. If you're a seasoned sewist, you may want to read through and then go do your own thing. 

I still have baskets to make, but the problem is that I've already pieced and quilted the scraps. So we'll begin this tutorial with the idea that you've made a quilt sandwich of at least 16 inches square. I should mention that all of my basket fabrics were densely quilted using many motifs as this is a great way to practice your quilting.


At the cutting table. Cut your quilted fabric to 15 X 15 (photo 1).  I used a Frixion pen to draw lines in each corner indicating where I will cut (photo 2). The yellow ovals indicate where quilting pins are to stabilize the pieces since I cut two baskets at a time using my large titanium scissors. (Rotary cutters are difficult to control in corners.) The lines in step two above are 4½ " long for a medium size basket. (Please ignore what I see now looks like appears to be a bad cut on the bottom, that's a photo manipulation error.)  Photo 3 shows you what the piece looks like after cutting. 


On to the machine. Fold the cut piece on the diagonal so that you can match the two edges of one corner (photo A). When sewing these baskets, I make a straight seam ¼" from the edge, then add a zigzag seam on the inside (see my crazy drawing in photo B). This is to strengthen the seam in case the basket is used to hold heavy, bulky items. Once both sides of the basket are stitched, you can refold the basket to sew the other two sides. This is a little difficult because the basket does not want to fold flat (photo C); use a couple of pins and avoid pushing the center of the basket since that may warp the seam. Again sew a straight line and a zigzag line against the edge.


Binding. You should now have a box shape (well, sort of anyway) and are ready to finish off the top. I have tried a couple of ways to do this, and believe me, I have some messy baskets to prove it. I've finally settled on one technique that works well for me. 


Cut a strip of binding 1½"  X 16". Turn the basket so that the seams are on the inside and pin the binding around the top edge (photo A). TIP: Now is a good time to add your label. Double check your binding to connect the ends: there should be a 1½" overlap. Anything over needs to be cut off. Fold and pin as in photo C. Cut the excess and finger-press the seam open (photo D).  You can now sew the binding completely around the basket. TIP: Take your time, stop often and readjust. Otherwise, the basket will catch on everything in its path and derail your stitching. 


Once the first part of the binding is sewn, turn the basket so that the seam side is out. Flip the binding up (photo A); then fold it in half (photo B) and in half again (photo C). Pin well and edge stitch (photo D). TIP: Take your time and try to make a neat seam as this one will show. All Done!


Squaring up. I spent a great deal of time trying to get my basket into square shapes. It was one of those things that I had to prove to myself. So I pressed. Then I sprayed water and pressed. I used steam. I tried sizing. Finally, I had an idea! 

My secret: weight. (No, not mine but I considered...) I digress. 


First you have to press with the iron to set the lines. Use the seams to figure out where the fold lines are at the bottom of the basket. Fold and press from the bottom end  of one seam across to the seam on it's side (corner to corner). Do all four bottom lines; then do the side seams. 


Now you can fold the basket into a box shape. Think of a paper bag fold. First push the sides inward (photo A); as the sides fold, the bag will collapse in on itself (photo B). That's a good thing, so hold it if possible. Check that the edges are straight and pin (photo C). Then put something with weight on top of the basket (photo D). 

I leave the weight on the bags for a day or so. I also stack several bags on top or beside each other and use the same weight. Of course, heavy books will work, but I've been using a plastic container of fabric (really anything heavy but clean) and I'm quite satisfied with the result. 


This nesting stack shows the difference between the two that have been weighted (as opposed to pressing with an iron) and the top one which has not been weighted.

Nest your baskets. I used an easy formula to create my nesting baskets. I cut all of my quilted fabric the same 15" square. The corners are where I made the changes. I started with the 4½" and then cut the next one 4" and the last one 5½".  The changes are very subtle but it's just enough to do the job. 


Thanks for visiting and making it to the end! I hope you enjoyed the tutorial and that it answers all of your questions. If not, please let me know in the comments. Do you plan to make a few quilted baskets or have you? I'd love to know how they turned out!

Linking Up with the Party Queens

Crazy Mom Quilts

My Quilt Infatuation

Busy Hands Quilts

Confessions of a Fabric Addict

Brag About It @ My Husband Has Too Many Hobbies


Wednesday, February 22, 2017

Scraps, more scraps, and even more scraps!

When I got really serious about using my scraps, one of the first things I did was to make bins to put them in. I sort by color, but I've found that many quilters use size and shape as their primary sorting system. No matter how you store them, you do eventually have to use them. I decided to share a few of my ideas for using the scraps that muliply like rabbits. 


Of course, I've made scrap quilts using a variety of colors, and I've made a few using only one or two colors.  I've found that a limited palette is a great way to use up the scraps that have gotten out of hand. 

In fact, I've made quite a few quilts using just scraps or mostly scraps with a solid background. The blue quilt above and the red one below are made from HSTs set in different patterns. Though the quilts look the same size, the blue is a baby quilt and the red chevron is a queen.


This brown/beige/gold quilt was a good way to use up all the scraps I had in those colors. The trick is to limit the palette to colors in the same family and include a variety of shapes, sizes, and textures. My only other trick is my design wall and camera. Though I take bad pictures, looking at the arrangement on the design wall through the camera lens really helps me to see what stands out or recedes. 


Quilts that are going to have a solid background work best if they are wildly asymetrical or give the sense of symmetry. In the khaki coins quilt above, the coins are not symetrical, but they are evenly spaced and have clean edges, which gives a sense of balance and proportion. 


Obviously, I wasn't even trying for any kind of balance or sense of symmetry in these last two quilts. In the one above I was playing with techniques that I wanted to practice or try out. In the one below, I was simply trying to use up some blue scraps. Heavens, those blues just keep mulitplying!


Another way of using up scraps includes making a rag rug for the camper out of fabrics that I don't want to put into quilts. It's not the prettiest of rugs, but it will do the trick and used up a huge amount of fabric scraps cut into one inch strips. 


Additionally, I use my Accuquilt cutter to make kits that sew up extra fast. Those I take with me when we go on vacation so that I have some sewing to do. While I've read blogs suggesting that fabrics be cut into uniform-sized pieces, I do this only when I am cutting the pieces for a particular quilt. Since I tend to sew scraps in an improvisational manner, I like to have all shapes and sizes available. However, whatever works for your needs is what I recommend you do.


I love making small pincushions using my scraps, too. I have a plan for some of them when I go on a retreat in March, so I'll be hitting the scraps again soon to make a few more. In the meantime, I'm working on a scrap project that may prove just how insane I am. Unfortunately, I'll have to keep it on the DL for a little while longer. 


Lastly, I use scraps for many small projects. I've used them for baby items, such as bibs, diaper covers, and changing pads. As a matter of fact, I have a few of those on my To Do List...just need to get to them before the end of April. When this newest baby gets a little older, I'll make a doll quilt or two.

How do you use scraps? Do you have any favorite scrap projects? I'm almost out of ideas for using them, so any suggestion that adds to this list will be greatly appreciated. They are still multiplying!