Showing posts with label DIY. Show all posts

Friday, April 17, 2020

Pin It Weekly #313

Hello Pinners! Meet some new friends. Introducing Toni Hall, who has a board titled "I Think I Can" and I love it. Here's why...


Not that I crochet, but I think I could. Maybe not well, however. :) Buzzin Bumble is a blogger who has some interesting pins and posts that you might want to check out. Lara is the author of Crafted Applique': New Possibilities. I do not have it, but I will look into it. Isn't this just the cutest cover? I bet that sweet camper is inside!
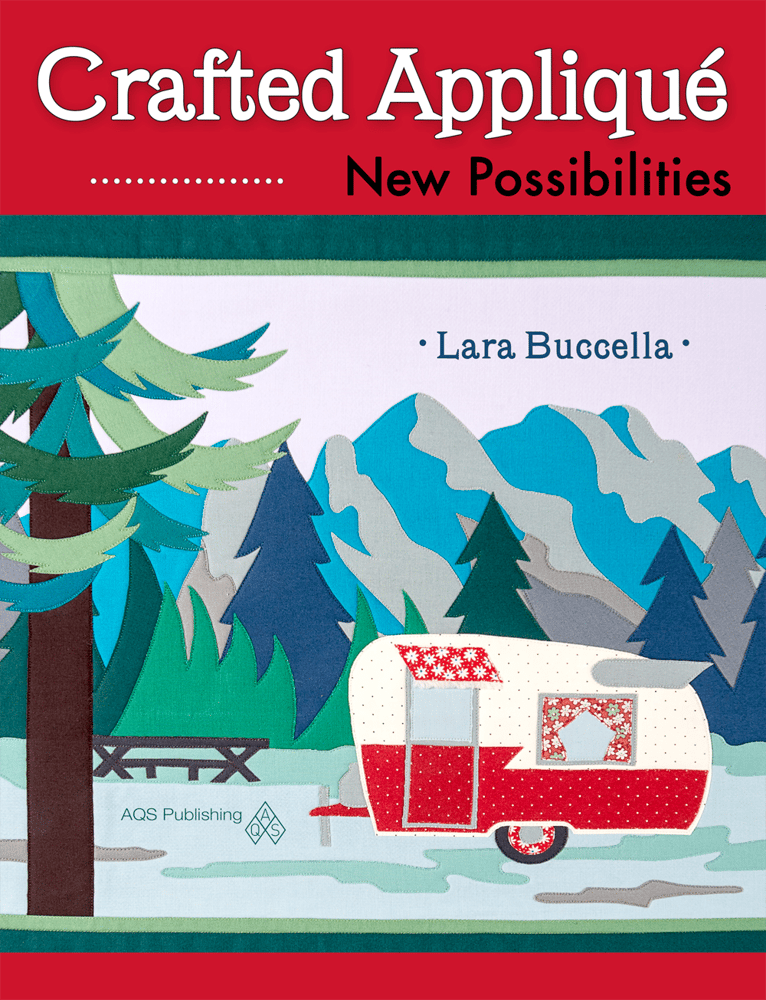
Image of Crafted Appliqué: New Possibilities

She has a board called Polaroid Quilts that I had to look into. What an interesting concept. It's a whole thing. Have you heard of these quilts before? I have not. Where have I been? 
PDF Picture Perfect Polaroid Photo Quilt Pattern from Quilts by Elena

A free no math polaroid quilt block tutorial. Learn how to make polaroid quilt blocks in any size - with no math required!

littlemissmk: Snapshots of a Good Dog Quilt

Polaroid Quilt by QuiltsByEmily, via Flickr

After leaving that rabbit hole, I visited the NW Quilting Expo. I was there a while, too. It's amazing I get anything done! BTW, whoever keeps up their Pinterest does a fabulous job. There are way more boards and pins than I expected.
Learn about Helen Remick and all of the other Northwest Quilting Expo 2016 featured quilters on our website.

Northwest Quilting Expo  Portland OR Sept 2015 www.nwquiltingexpo.com #nwqe #quilt

Northwest Quilting Expo Sept 2015 #nwqe #Pdx #quilt

You can only imagine the creative #quilts displayed NOW at the #Pdx Expo Center! 9 am - 5pm last day ‪#‎nwqe‬ #‎sew‬

Wash your hands and wear your mask.

Wednesday, January 15, 2020

Pin It Weekly #302

Hülle für den Filofax Terminkalender nähen Schnittmuster und Anleitung kostenlos
Let's say hello to a few followers. 

The Lincoln MQG has this adorable planner cover that threw me down a rabbit hole of crafty things I'd like to make. Here are a few of the other pins I couldn't resist in that rabbit hole.


My Zippy Quilter's Planner Cover - The Crafty QuilterFree Zippy Quilter's Planner Cover PDF Pattern | The Quilter's Planner

Susan Sweeney did me the favor of pinning a few more of these craft items. Which I also pinned to "craft diy make."
Bedside Pockets Organizer - free sewing tutorial — SewCanShe | Free Sewing Patterns and Tutorials

Car Diddy Bag - Free Sewing Tutorial — SewCanShe | Free Sewing Patterns and Tutorials

Emily Taylor has some interesting pieces of furniture pinned. 
Konrad Dining Table in Carob design by Nuevo – BURKE DECOR
Dexter Leather Arm Chair | Rejuvenation

Patrick Mid Century Antique Brass Oak Wood Dining Table
And finally here is The Cheeky Cognoscenti with some fun applique blocks.

Jingle BOM Applique Block 2, Design by Erin Russek of One Piece At A Time

IMG_1274 | Flickr - Photo Sharing!

Name Your Goliath: My Giant Is Named JINGLE, So I'm Quilting It Anyway

July pictures 001

And that's today's PIW. Have a great week!

Wednesday, March 21, 2018

Billy's Memory Quilt ~~ finished!

Memory quilts seem to be the most requested commissions I get. I'm a little tired of them, but this particular quilt is really special because I made a memory quilt for this mom in 2015. That one was for her oldest;  this one is for the middle child. She brought it to me in the fall, but allowed me to push it back to get other quilts done.  

This little family has seen a few changes: mom got remarried and had a baby. That older brother started college. This one is graduating in May. And somewhere between this graduate and the baby, there's another boy. So mom was not shy about asking me to keep costs down. Somehow, I managed to keep the price down enough that it almost matches the first memory quilt I made for her back in 2014-15. 


That's me playing quilt model in the whole quilt photos. Richard's back and neck hurt too much to hold his arms overhead, so I climbed on a patio chair and did the honors. Hmm, no wonder everyone tries to hide when I come around with a quilt and my phone--quilts are heavy! 


One of my favorite parts of this quilt are the tee-shirts Billy painted. The one above is especially cute. The bottom of the shirt and both sleeves had been cut into small strips and embellished with beads. (Could there have been a girl in the vicinity?) I didn't want to lose that personal touch, so I cut off the fringes and sewed them into the quilt along the top of the shirt. They are still free to move around and really give the quilt some character.


 Another shirt must have been painted at VBS or church camp. There are lots of Christian symbols on both sides of the shirt, so I cut the front and back and stitched them together to make one panel. Then I custom quilted around the fabric paint to help make the letters and symbols stand out. 


Because mom had asked that I keep costs down as much as possible, I decided to stipple most of the quilt but just couldn't help myself on some of the shirts. This sports shirt is one example: I stitched around each of the players so that the characters stand out against the white background and to avoid cutting bodies with stitching lines. This one was great fun--I guess the only thing I didn't stitch is the background!  

Quilt Stats
Name: Billy's Tee-shirt Memory Quilt
Size: 60 x 80
Fabrics: Tee-shirts from client
Backing:  muslin (from stash)
Binding: black Kona 
Pattern: puzzle design
Quilting: stippling
Completed: March 2018

Another way that I saved on costs for mom was to put a few of the shirts on the back. The quilt is not so wide, but it's still ample enough to cover a pretty good size guy.  What do you think about my cost-saving measures? Do you have a few tricks to lower the costs for clients? I'd love to see a few that I can share with my customers. (And still make a few dollars.) 


I am committed to one more of these, then I think I'll take a break and play with my own projects. We'll see how that goes! Have a great week of quilting everyone!

Sunday, November 19, 2017

How to Make Decorator Corners on Pillows Tutorial

Yesterday I promised to write a tutorial on how to create pillow corners so that the corners look square. They really aren't, but you'll see that in a moment. I'll assume that you've already sandwiched and quilted the front panel of your pillow cover and are ready to make the back and sew everything together.

Cutting the back panels
First determine the size you will need for the envelope backing.  Let's say you are making a 14" square pillow cover. Your back will need to be 14" in length. To determine the width, take that number (14") and divide by two (now you have 7") then add four inches (for a total of 11"). Cut two pieces of fabric 11" X 14". 

Let's do another one just for fun using 18" for the square pillow.
18 / 2 = 9 add the 4" overlap 9 + 4 = 13 so your backing panels will be 13" X 18".

Tip: You can use the same equation for any size pillow--just substitute the very first number (18 in this case).

Tip: I find that adding four inches works well, but you can make adjustments if you want more or less overlap. Keep in mind that more overlap makes getting the pillow form into the cover difficult. Less overlap will distort your pillow.

Hem the panels
Fold and press one long side to form a small ¼ inch hem, then fold and press again so the raw edge is completely enclosed. Sew your hem and repeat on the other 11" X 14" panel. In this next picture you can see how the panels are hemmed (blue arrow) and then placed on the pillow top.


Layer the pieces (RST)
You're ready to layer the pieces. Start with the quilted front of the pillow cover. Lay it down on your work surface, right side up. Place your back pieces so that the finished sides of seams are facing down and are in the center of the panel. In the picture above you can see how the sewn edges overlap each other in the center of the pillow cover. 

Mark the corners
Before you sew, you'll need to mark the pieces so that you can cut off a bit of each corner. A better way to explain this is to show you the outcome.


Notice how the purple and gold pillow has "bat ears" sticking out? The other pillow looks square. That's because I trimmed the corners to give it the illusion that it's square.


The way to achieve this look is actually quite easy. Begin at one corner of the pillow and measure ½ inch from the corner. Using a fabric pen, make a small dot. Now draw a line from the dot to about ¼ of the way toward the center edge like in the drawing. Draw lines on all four corners. Look at the photo below (yes, it's the same as above). You can see the drawn lines on each corner. Notice that I didn't draw lines all the way around the pillow. That's because I will use my normal seam allowance and don't really need lines. (Or maybe because I'm lazy.)


Sew
Sew all the way around the pillow cover, using the drawn lines as necessary in the corners. Just keep a ¼ inch allowance where you don't have lines.  Easy peasy! Tip: If you are using your home sewing machine, you should zigzag close to the straight seam to prevent raveling.

Trim

Once the seam is complete, trim the seam allowance to ¼ inch in the corners to make turning easier. Tip: Be careful that you don't cut the zigzag stitches.  


Turn and Press
All that's left is to turn the pillow cover right side out through the overlapped back. Be sure to push the corners out to get a nice, sharp point. A good steam pressing should do the trick to keep the seams nice and crisp.

Extra Tips!

When pressing the seams, try not to push down on the center of the pillow so the quilting will stay nice and puffy. 

This method also works for pincushions. Just be careful to adjust how much of the corner to trim down. Small corners mean less to cut off!


I sometimes sew and cut the corners just a hair more than ½ inch. It will bring the corners down and make them more square. Be careful, though, too much will give the corners a rounded look. This purple and gold one is a good example of that. 


Now it's your turn! Tell me about this tutorial. Is it detailed enough? Did you understand each part or is something about it confusing? Seriously, let me know if you would use it when making pillow covers. I've been thinking of writing a few more tutorials now that I have a little more time, so your feedback is important.

Sunday, January 8, 2017

Sunday Quilt Inspiration: Onesie

Guessing by all the things that have been given to Dusti, her little girl is not going to need clothes. Nevertheless, I spent this afternoon working on a little outfit for the new baby. She's not even here yet and already I'm sewing for her. Something tells me that there will be lots of these little projects. I imagine this is what happens when you spoil a grand and sew every little thing she wants.


I'm thinking that we'll have to trim the ribbon tails when Dusti sees it, but I love the ribbon when the onsie is held up and the tails are loose. Dusti is a bit particular, so we'll see.

Ruffled buttom. ..all the little girls to be in our family :) cuteness.:
Original version
My version

Since onesies are on my mind, I figured I'd take a look at what Pinterest has to offer in the way of diy. 

I CAN NOT wait to have a little girl so I can add ruffles to the back of all her onesies :-)

Quick holiday shirt idea.  Can be used on a onsie, a t-shirt, or a sweatshirt!:

Valentine Shirt or Onesie- Ribbon Heart- Sizes NB-6 girls. $20.00, via Etsy.:

The Cottage Home: Embellished Onesie Baby Girl Dress

Homemade onesies are so cute.  I love the idea of using ribbons.  This could be a whale, a lion, a bird, an elephant... so many choices!:

@Kathryn Nichols. You could easily make this girly by adding a little bit of tulle around the middle and using different ribbon and buttons. And even a sparkly bow tie! So adorable.:

A little baby tutu and embellished onesie I made for a friend's baby shower.  vdm:

I love elegant-looking stuff for babies ;):

Make a shirt for Munchkin?:

New Baby Girl Patriotic Ribbon Flower Onesie by SweetCrusaderStyle, $16.00:

So cute for the hot summer! Onesie with Initial and Pink Leg Ruffles - long sleeve or short sleeve - newborn to 24m. $16.50, via Etsy.:

And what is Sunday Quilt Inspiration without the inspiration part?
Not much...so baby quilts newborns.
tumbling blocks baby quilt Full View:

Amish Infant Quilt Star Flower Pattern by QuiltsByAmishSpirit, $250.00:

Amish Infant Quilt Log Cabin Pattern Unisex by QuiltsByAmishSpirit, $250.00:

Soft Flannel Baby Blanket | Flannel Baby Quilt | Newborn Blanket | Infant Blanket | Gender Neutral Blanket | Soft Baby Blanket | Giraffe:

This little quilt is too cute for words! Not only are the strips of colors in playful bold colors but the print is simply adorable. The print is called "Just Hanging Around" and it features all sorts of silly animals "just hanging" on some tree branches.  The quilt measures 38" x 40". Perfect for that new baby or the stroller or car seat.:

Blue and Green Modern Baby Quilt, Gender Neutral Patchwork Baby Blanket, Olive, Turquoise and Navy Blue Infant Crib Quilt by MyBitOfWonder on Etsy:

bedding:

me encanta la convinación de colores...:

The wonderful Amy at Amy's Creative Side continues to host these biannual bloggers festivals. A chance for us to show a favorite quilt and t...:

_ABC_Boys_Quilt:

J007 Three Little Engines:

Check out more baby quilts on my Pinterest board, "baby, quilts" where I have about 150 pins. 

Have you seen any good diy pins lately? Please let me know in the comments.