Showing posts with label finished quilts. Show all posts

Friday, October 2, 2020

"All About the Boxes" ~~ Finished!

  I don't like to call any of my quilt UFOs. That implies that I have no intention of getting back to them. This quilt, however, was at the very bottom of the bin. And has been there for a while. Okay. Years. I don't know how many years, okay. Just a long while.

 But take note, it is out of the bin and complete! Yes, all the way complete. 
          • Quilted ✔ 
          • Bound ✔
          • Labeled ✔ 
          • Washed ✔ 
          • Photographed ✔
It looks pretty good next to my orange Adirondack chair, doesn't it? I have another confession: everything was neatly folded up together, top, backing, and...these large blocks. They didn't match the blocks on the top. I'd have liked to use them to make the top longer. 


I have no idea what the devil I was thinking, so I decided to make a new plan. I stuck them on the back of the quilt. Now, there was enough of this green stripe fabric for the whole back, but I added the kooky blocks, which gave me extra of the green. So I did what any self-respecting quilter would do, I planned it so that I could use the wider stripe as binding. Cut on the 45 degree, it gives an interesting look to edge of the quilt. 
 And just like that, a UFO has all its boxes checked! 


Quilt Stats


Name:

All About the Boxes


Size:

48" X 48"


Fabrics:

fabric from stash


Pattern:

my design


Backing:

from stash


Batting:

100% Cotton


Binding:

fabric from stash


Quilting:

improv with various motifs


Completed:

2020

Tuesday, September 22, 2020

Improv on Point ~~ finished!


This quilt is already one of my favorites. It was a struggle for a while, but once it started coming together, I fell in love. 


Turns out, all it wanted was to be turned on-point, which made it a little more difficult to piece together. 


I made large chunks of red pieces and larger chunks of neutral/brown/gold with a little red mixed in and built most of the chunks using a modified log cabin technique.


Since the front is all improv, the back should be. Right? So it is. I used more of the linen, but didn't have enough for this 71" square quilt, which means I was forced to add other fabrics. Those cute cherries and a burgundy paisley were just the fit. 


I had such fun quilting small improv motifs across the quilt. No rules, all improv! And then I bound it all up with a burgundy solid that I've had for a long time. That means I made "Improv on Point" entirely from scraps and stash!


Quilt Stats


Name:

Improv on Point


Size:

71" X 71"


Fabrics:

scraps from stash


Pattern:

my design


Backing:

cotton and linen from stash


Batting:

100% Cotton


Binding:

burgundy fabric from stash


Quilting:

improv with various motifs


Completed:

2020


Saturday, September 19, 2020

ROAR! The Dinosaur ~~ a finish!

"ROAR! The Dinosaur" is a recent finish that I have not written about because, frankly, it's been too hot to go outside for more than a few minutes. I won't even attempt to describe the mosquito problems. Let's just say I'm thrilled to have cooler weather. It's amazing that temperatures in the 80s is miserably hot in May, but in September the 80s are remarkably cool. 

So back to "ROAR!" It's the little quilt that I cut out and sewed up at the Cotton Quilters sew day last month. I was able to finish the top and loaded it on the long arm the following day. It waited on me for a while, but the thing about having a quilt loaded is that I am committed to that quilt before working on another. It's a sure way of getting a particular top quilted.


There's not much to say about this little quilt. It's simple but cute and definitely for a little boy. I had enough of the dinosaur fabric to use for backing and almost enough (but not quite) for binding. I used a solid brown in one of the corners to "stretch" the binding. It works and so far no one has noticed unless I point it out.


I actually have a couple of other finishes to show you. I just let them pile up and today hung each one on the line to get some photos. 


Quilt Stats


Name:

ROAR! The Dinosaur


Size:

44" X 46"


Fabrics:

various juvenile fabrics from stash


Pattern:

my design


Backing:

dinosaur fabric from stash


Batting:

100% Cotton


Binding:

fabric from stash


Quilting:

improv with various motifs


Completed:

2020


Friday, May 8, 2020

Magnolia II ~~ art quilt finish

When I posted my finish on Tuesday, I knew that I was close to posting about this painting as well. It was complete, but drying seems to take forever. Then there are those photos that intimidate me so. But I'm persistent, if nothing else, and have something to share. 


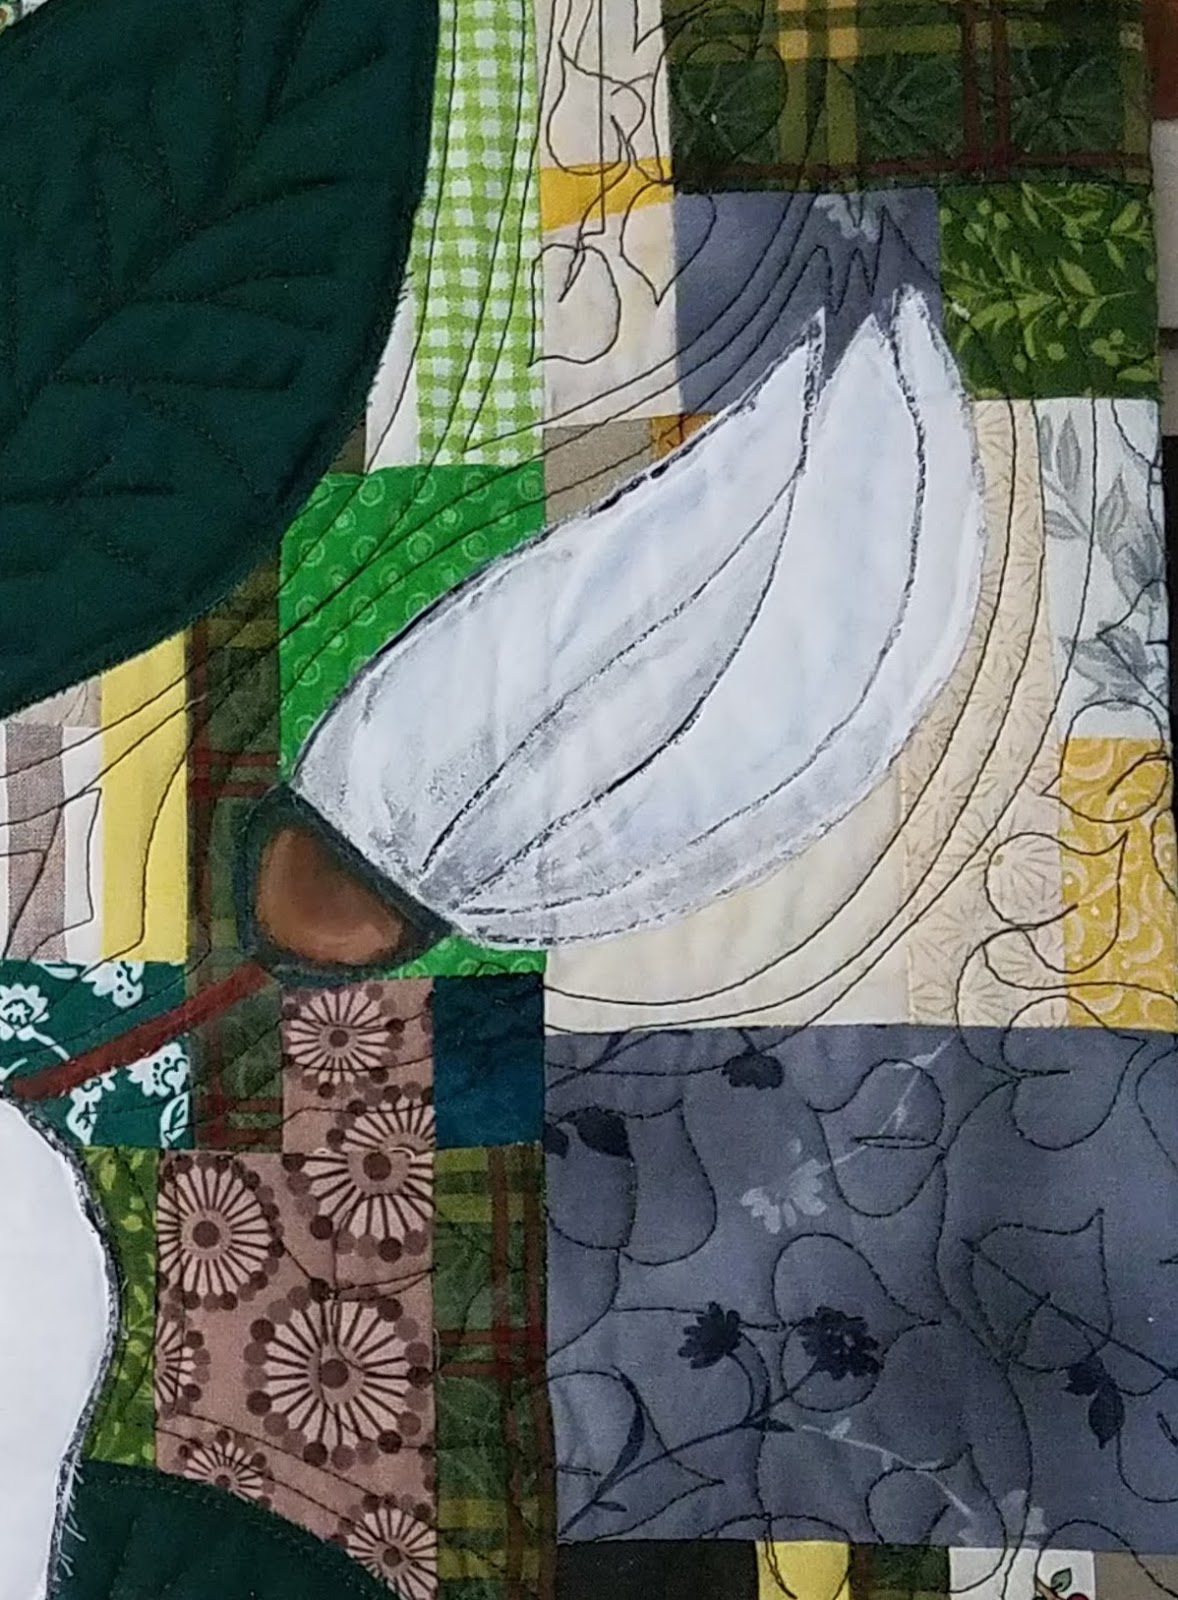
Several people have asked me how I create these since it's an odd way to paint. So here's the short version. Start with a subject that can be isolated easily, so it almost has to be a physical object. Create a background using fabric (scraps work nicely). I think of it as making a quilt top. 


After loading the quilt sandwich onto the longarm, I plan and prep the painting area with gesso. Because you aren't painting the entire panel, plan carefully. I pencil in and quilt the outline of the subject. 


Now we're ready to move on to painting. I alternate between painting and quilting. I've discovered that one informs the other, and I tend to work improvisationally.  


An example of that improvisational work is this bud in the upper right corner. I decided to include it as I was painting the large magnolia and wanted it to be a secondary element, almost not noticeable. While I was working on it, I realized that the green stem receded into the background, so I repainted it in lighter browns that contrast more with the greens, yellows and browns of the background. 


And just like that, weeks later there's a painting ready for framing. Richard is wonderful about making frames, so as soon as trim and measure the work, he builds a frame--to 1/16 of an inch. (As if I'm going to manage that math!) Once a work is framed, I clean the painting by removing threads and touch up the paint as needed. How's that for a "quick" explanation? 

Tuesday, May 5, 2020

Magnolia I ~~ art quilt finish

I love combining quilting and painting--remember the cotton paintings? There's another here. It's a time-consuming joy that I don't think I'd have been able to appreciate back when I was working. Oddly, I started painting not long before retirement, so everything just sort of fell into place. Well, I've moved on from cotton to magnolias. 

This is my first attempt. I see so many flaws, but I've decided to let them go. If I move on, I can take the lessons with me to the next painting. 


While they are glaring in real life, they don't look so hideous in a photo. Getting depth was a struggle, but making the petals look cupped and curled...it feels impossible. But I'm determined!


And then there are the leaves to contend with. I need to work on those. But there's something I did that I love and that was to add ghost leaves in the background. I might do things a little differently later, but this idea really works for me.


There's another coming. I like it even more than this first. But I took an informal poll on Facebook and the two are about even in preference, so maybe I should show this one a little more love. What are you thinking of this one? What constructive criticism can you offer? I want to improve and knowing what to work on makes that job a bit easier.


Thursday, April 9, 2020

More Masks and "Favorite Fabrics" ~~ finished!

Do you know how good it feels to pick up a quilt top, quilt-bind-label it, and call it done? Yes? Great. I'm here to tell you it feels even better when said quilt top has been waiting, patiently, in a basket or bin or (gasp) plastic bag for longer than you care to remember. Oh yes! It's a wonderful thrill. I recommend it highly. My heart still does a little flip when I think of it. 


More on the quilt later. First let's get these masks out of the way. There are 15 in this picture, more or less. Eight will go to a friend who requested them. The rest, I don't know. Maybe I should have a few here in case we need them. Heaven knows, I am done with these things. Could it be more boring? Not for me. I'm kind of ashamed, really. But 50ish are all I can wring out of myself for now. Maybe after Easter if there's still a need I can make more. 


Now back to this finish. At some point I realized that the very pretty pieces of colorful, playful fabrics that I'd purchased at 
Lola Pink in Lafayette were becoming smallish scraps. It occurred to me that together they would make a pretty quilt. So I gathered up pieces Since they were literally scraps, sizes were varied, but showcasing the designs was important. Otherwise, what was the point? 


The sizes were not cooperative but finally I came up with this clean, modern design. The blocks are 3½", 5½" and 7½" each with 2½white strips. Into the waiting bin the top went. And just like that, quilt tops are forgotten. They deserve better, so it's time to get them finished. 


I had this white linen with small navy stripes that was just large enough, so I figured it was meant to be. I should have used those stripes to my advantage, but no, I prefer to make things... challenging.

For no reason at all, I decided to use straight line quilting but to leave out the prints. Then after all that quilting, I realized that the largest blocks were too big to leave un-quilted. I added fleur de lis and lotus flowers to those blocks. It was a good opportunity to play with those two motifs, which I really like.


Quilt Stats


Name:
Favorite Fabrics


Size:
54" X 58"


Fabrics:
Various fabrics from stash


Pattern:
My design


Backing:
Linen from stash


Batting:
100% Cotton


Binding:
fabric from stash


Quilting:
Straight lines w/ motifs in largest blocks


Completed:
2020


Tell me what you think. I really like constructive comments. They help a person to access and grow. So yeah! Comment.