Showing posts with label #scrapattack!. Show all posts

Thursday, April 9, 2020

More Masks and "Favorite Fabrics" ~~ finished!

Do you know how good it feels to pick up a quilt top, quilt-bind-label it, and call it done? Yes? Great. I'm here to tell you it feels even better when said quilt top has been waiting, patiently, in a basket or bin or (gasp) plastic bag for longer than you care to remember. Oh yes! It's a wonderful thrill. I recommend it highly. My heart still does a little flip when I think of it. 


More on the quilt later. First let's get these masks out of the way. There are 15 in this picture, more or less. Eight will go to a friend who requested them. The rest, I don't know. Maybe I should have a few here in case we need them. Heaven knows, I am done with these things. Could it be more boring? Not for me. I'm kind of ashamed, really. But 50ish are all I can wring out of myself for now. Maybe after Easter if there's still a need I can make more. 


Now back to this finish. At some point I realized that the very pretty pieces of colorful, playful fabrics that I'd purchased at 
Lola Pink in Lafayette were becoming smallish scraps. It occurred to me that together they would make a pretty quilt. So I gathered up pieces Since they were literally scraps, sizes were varied, but showcasing the designs was important. Otherwise, what was the point? 


The sizes were not cooperative but finally I came up with this clean, modern design. The blocks are 3½", 5½" and 7½" each with 2½white strips. Into the waiting bin the top went. And just like that, quilt tops are forgotten. They deserve better, so it's time to get them finished. 


I had this white linen with small navy stripes that was just large enough, so I figured it was meant to be. I should have used those stripes to my advantage, but no, I prefer to make things... challenging.

For no reason at all, I decided to use straight line quilting but to leave out the prints. Then after all that quilting, I realized that the largest blocks were too big to leave un-quilted. I added fleur de lis and lotus flowers to those blocks. It was a good opportunity to play with those two motifs, which I really like.


Quilt Stats


Name:
Favorite Fabrics


Size:
54" X 58"


Fabrics:
Various fabrics from stash


Pattern:
My design


Backing:
Linen from stash


Batting:
100% Cotton


Binding:
fabric from stash


Quilting:
Straight lines w/ motifs in largest blocks


Completed:
2020


Tell me what you think. I really like constructive comments. They help a person to access and grow. So yeah! Comment.

Tuesday, June 19, 2018

Saturday Sewing

Image result for vortex quilt amandajean nybergI've started a new quilt top. It's somewhat like  AmandaJean's "Vortex" quilt. However, I've made other quilts that use only scraps in them.

It's just a matter of sewing lots of scraps together. I tend to make sheets about the same size then sew those together to make larger sheets. "Murky Waters" is a good example of my process.

"Murky Waters" Mary Marcotte 2016 A scrap quilt in beige, tans, browns like the water in the bayous near my Louisiana home. www.fleurdelisquilts.blogspot.comWhat I have under my needle will be more colorful since I'm using scraps from every bucket in the closet.

Most of the scraps are some were cut into 2½" strips. Those too small to be a strip turned into blocks. I have lots of strips! My plan is to use any extra 2½" strips for binding once the quilt is finished.

I'm stopping right here to define/explain my process and define scrap, slip, sheet and script. Those are the words I use in this process. First I sew small pieces together. I just keep sewing and sewing small pieces. Generally I try to match the sizes of two pieces but I might sew two small pieces to a larger piece without cutting anything--that comes later. 

When I have (about 25? 46? 97? I don't know) enough to be tired of this process, I take the whole thing and go to the iron. Press open to the darker side. Snip them apart and trim really jagged edges with scissors, take them all back to the machine. Now I sew them into slips of fabric. A slip is a small piece of joined scraps. Imagine that you tear a piece of paper to write a note. That's the size of a slip.


Okay so we have lots of slips, go to the iron and press, snip, trim using the iron and scissors. Important note: from this point onward, I look at the number of seams and press away from the side that has the most seams. The idea is to reduce bulkiness. 

I start joining slips into sheets. If two pieces are close in size, I may add a long scrap to the smaller one, then come back to sew them together later. It's not a big deal if they don't match up perfectly. Sew, sew, sew. Sew some more. Use up all the scraps and slips if possible. (It never is, but we can hope.)

By now you have the routine: sew scraps into slips. Sew slips into sheets. Sew sheets into scripts. (See what I did there? All writing words from an English teacher.) But I add a step at the end. After pressing the sheets, I take them all to the cutting table and cut one edge using my ruler and rotary blade. A square edge makes sewing sheets together much easier. I try to avoid having parallel seams on the edges as they can get sewn into the seam and cause bulkiness. 


Okay, so we have scripts. Hopefully many of them. I press and trim, then cut all four sides of a script into get squares and/or rectangles of uniform sizes. Sometimes "uniform size" means only two will match. Finished scripts go on the design wall so I can look at how they will fit together. Once there enough for a quilt, sew them together and there's a top.

So far, I have quite a few nice sheets. It's going to take many more sheets to get the queen size that I'm dreaming of. It's one of those I-don't-have-any-idea-why quilts. I think it's just to get back into the quilting groove. 


So on Friday I started sewing scraps together, just to be able to sew. On Saturday I started making sheets about 10" x 10"--give or take. Then had an idea for how to use them. On Sunday I woke up to another idea that I liked better. So I ripped out a few seams and started over. It's Tuesday and I don't like the pattern or the colors. However, I've got to stop this wishy-washy business and do something. To that end, I'm just going to keep sewing more scraps and slips and sheets and scripts. Something's bound to happen. Right?

Tuesday, February 13, 2018

Killing Time and Ballet on Pointe

I finished the Harley Davidson quilt top last week but didn't have the backing fabric that I wanted. While I had a few days of down time, I decided to sew some blue scraps together to make some small blocks. The blue bucket was spilling over. It's not that bad now, but it sure seems that I didn't reduce the volume by much.

I have a new set of rulers that we bought about a month ago. I wanted a 15" square ruler to make cutting tee shirts easier, but the set of four was cheap enough that I got the two smallest rulers at no cost. I didn't think I'd use the small rulers (4" and 6") but found that I was able to put them to use with the blue scraps.


I simply sewed pieces together until I had enough to cut out either 4" squares or 6" squares. Later, when I have time again, I'll make some 10" squares. Then it will be time to decide what to do with them. I've started with 12 of each size and am already finished with the smaller sizes. 


While it seems that I didn't use up a great deal of fabrics, this trash basket holds the cut off. Most are slivers smaller than a 1/2".  


All of that will come back into play when I have the HD quilt finished. Hopefully I'll be able to load it onto the long-arm tomorrow.

On Pointe
Since I needed some backing fabric for the HD quilt and Jolie needed some ballet toe pointe shoes--hers were destroyed in the fire--we decided to make an afternoon trip to Lafayette. Her dance school purchases all of their ballet shoes at The Ultimate, so that's where we headed. 

I loved the store! The two ladies were very kind and helpful. Once they learned that Jolie lost her first pair in the fire and had had them only a month, they gave her a few of the accessories that she needed. 

 The store is beautifully decorated with many ballet shoes in flower arrangements, as part of a collage of photos and mementos, and scattered around the room on small tables and in dishes. I kind of wanted to ask them to let me make an arrangement using some shoes. 

Once we got home, Jolie wasted no time in asking me to do some hand sewing. The sales lady pins the elastic and ribbon in place, but someone has to sew them in. It took me a while to figure how to stitch each piece because the thread is really a thin cord and the inside fabric of the shoe is leather. 

Poke and pull sewing is not fun. It took me an hour to sew in the elastic, so I decided to put the rest of the sewing off until tomorrow. 


Jolie called at 9:30 to beg me to finish so she could dance tonight and "break in the shoes." I don't think she will accomplish that tonight, but who knows. How about this picture of Jolie trying on the shoes. I knew she could stand on pointe, but seeing her with the ballet shoes on and in position really made it hit home. How beautiful is this picture?


Eventually I got the stitching completed. She was extremely happy to race in to pick up the shoes. 


Can you see my stitching on the side of the shoe? There are two places: on top of the elastic where it meets the heel and to the front of the elastic where the ribbon is attached.


 As a child I wanted to learn ballet and have a pair of toe pointe shoes. I guess it is possible to live life through your children and grandchildren. I can only hope that I would have sported a pair as gracefully as my beautiful granddaughter does. 


While I've repaired many strange items and I've made baby booties, I've never finished a pair of real ballet shoes. It was fun and required a bit of creative problem solving, but I think it was a success. 

And because I have a video of Milly on the move, here's a copy


Friday, January 19, 2018

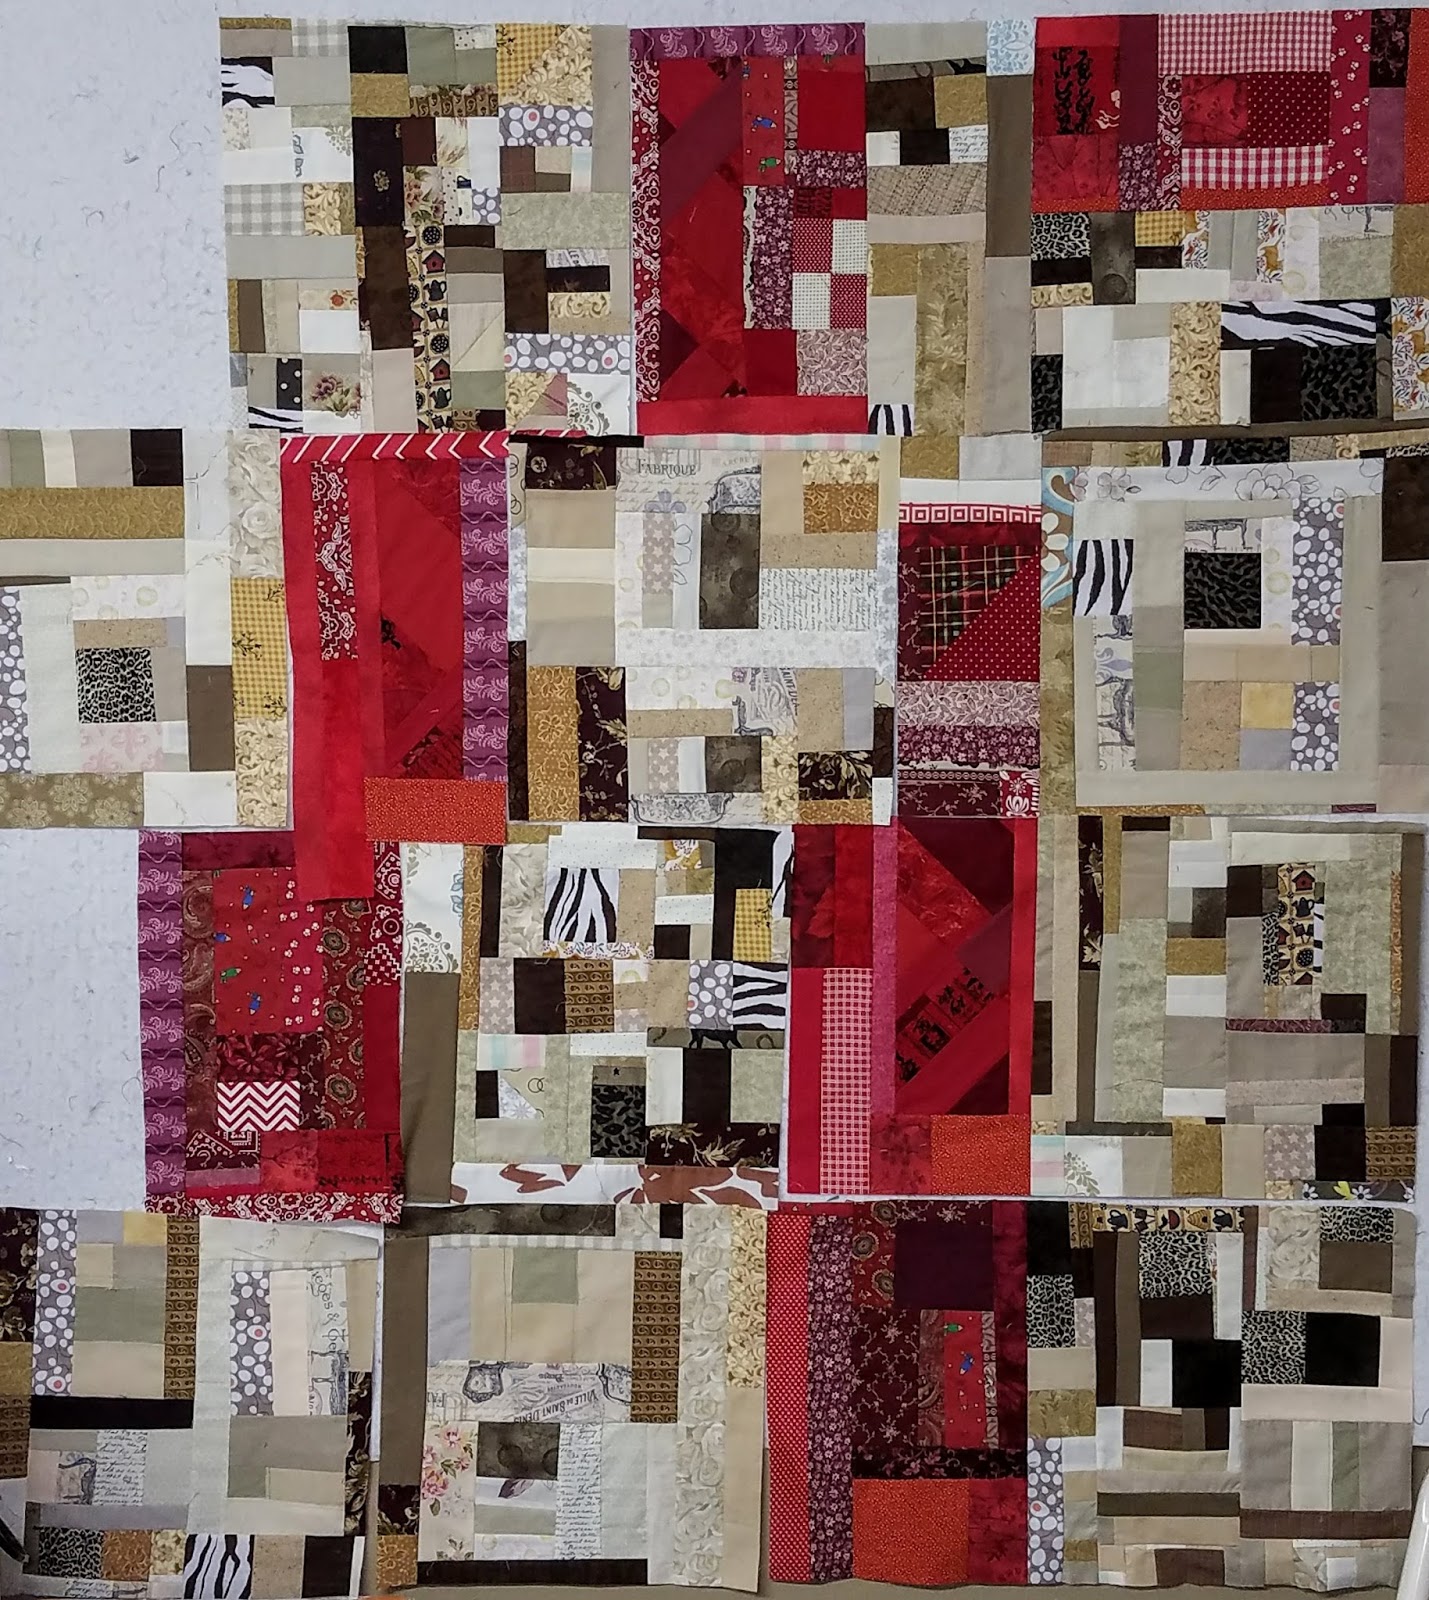
Neutrals and reds and math


Oh my heavens, y'all, I do not know a bit of math. Nothing. Nada. Puh. How do I know? Because I needed math all day. Know what I got? Puh!


I've continued working on the neutrals scrap quilt top. Thanks to your encouragement, I decided to keep going with the red scraps because, I wanted to make it work. I'm hard-headed that way. Besides, I had sewn some of the scraps into fabric blocks. 


I have a 15" square ruler and cut the beige pieces into uniform blocks to match the ruler. That was easy and helped me with the math. I'd made about nine of the blocks before beginning with the red. As I added red chunks to the beige blocks, I re-cut the blocks so that they were back to 15". But I have more creativity than good sense, meaning I abandoned the one thing that made the math easy.


I started adding red to the beige blocks and didn't make the extra cuts. Instead, I made bigger blocks and tried to match them up. That didn't work. I rearranged the crazy big blocks. No. 


I rearranged and made strips. Then I rearranged those strips, adding more beige in places, thinking there was now too much red. No! 


Then finally. Finally! I arranged the pieces on point. Yes. That somehow did the trick. I liked the angles of the individual pieces and small strips. 

So what's the problem? Well, math. As long as I had uniform blocks, I could do the multiplication and division. But now things were happening on an angle and in an unsystematic manner. The biggest blocks were all about the same 15 x 20, so I made one strip of those. Sewing them on the 15" edges? No. That would make the strip match the others. 


So I have one strip that is 20" wide; none of the strips are equal in length; and everything is on an angle. Yes, there's a chance that this quilt will unravel me! 

When I decided to phone a friend, I considered calling my sister Lee. She teaches high school math. The hard math. But I figured that I should ask Richard first. I called him and tried to tell him what I needed to know. Turns out I couldn't really explain it to him. Regardless, he was stumped. Okay? So then, I'll call Lee. He laughed at me! How dare he? 


Then he told me why he was laughing. I didn't know what to ask. Honestly, at the time I couldn't even think of the words equation or formula. How do you tell a math teacher what you need if you don't know any of her math words? 


In the end I decided to keep adding pieces and triangles until the 15" strips match the 20" strip. But they have to match on an angle. 
Check out this last picture. I have two sides with straight edges! And know what? That crazy 20" strip is in there! It IS the upper left corner and matches up with the other strips. If you look on the bottom right corner, I have another corner. Whew! Math is stressful!

Link Ups!

Friday, January 12, 2018

Not so sure about this one

I've started a new project using scraps. All was going along fine, until I ran out of scraps! Can you believe that? I want a quilt that will be larger than 45 inches square. That's not much of a quilt, unless it's for a baby. 

I don't think this one is for a baby. Though that's the closest I am to knowing what it is to be. Anyway, I was really out of scraps! That meant only two choices: cut up some yardage to make scraps--which somehow defeats the purpose--or pull scraps from a bin of a different color. 

The empty bin gave me nine nice 15" x 15" panels in beige, tan, and light brown. Great for a nine-patch kind of quilt, but do the math. 

I dug around in the other bins and found that the red, blue and green bins are all spilling over. I pulled red. Why not? I thought it would give a bright, happy contrast to the neutrals. 

I'm not happy. I don't know what's wrong, but I don't like what I'm seeing. I also haven't stopped doing. What is it about something not working that makes me keep at it? 

Oh, yes, I'm bipolar. I'm the laugh and cry at the same time kind of chick. Imagine you love everything at once and walk away with nothing. That's me. If I have too many options, I can't decide. If I have only two or three choices, I can't choose. Of course, I may make a spontaneous, fast decision and run with it. All the way. Goodness knows what's to happen if I discover that it was a wrong decision. I may ditch it and move on or fight for the wrong thing till the end with no apparent reason whatsoever. I'm all over the place at the same time. Maybe I should get back to that project problem.


So not like a project and keep making the project? Yeah, I do that. In fact, I'm in the very midst of that. I thought about adding a third color and that may still be the answer, but this red/neutral combination is just not what I expected it would be. 


I guess that I'll either figure it out or make the ugliest quilt top and set aside for, I don't know. Forever? It wouldn't be the first ugly quilt top. And whether I ditch it or finish it, that wouldn't be the first time either. 


Finished or Not Friday?  I'm may be both finished and not. How often can you say that?

Link Up Parties

Sunday, January 7, 2018

Sunday Quilt Inspiration: SCRAPS

Normally I would show actual scraps--piles of scraps--but those are not really a thing on Pinterest.  We'll just have to be happy with scrap projects to see the scraps. But after that, we'll take a look at some actual scrap quilts. Does that make sense? 

20  Fabric YoYo ProjectsThis gorgeous keychain is made with colorful, vintage kantha fabric, wound into a fringed tassel. Attach it to your keys, or we love it clipped to your favorite wallet or purse! - Approx. length 6" -

O Christmas tree, O Christmas tree...

Paint a canvas gray, and cut up pieces of scrap fabric to make this sort of Chrysanthemum!

Teeny mice from reclaimed fabrics with TUTORIAL (A LOT of pics!) - HOME SWEET HOME / Catnip mice! Reason #512 to (learn to) use my sewing machine.

Have Fabric Scraps? Here’s 21 Ways to Use Them Up! – How Does SheMade by Me. Shared with you.: Tutorial: DIY Cord Keeper From Fabric Scraps

Clever idea for fabric scraps and orphan buttons.

Fabric scrap matching game - Do it the fastest way, zig-zag applique all the "matches" to the solid before cutting, then zig-zag around them onto the background in a grid, leaving space between for more cutting. Cut with pinking shears.Better late than never right?  I promised this to you by the end of last week and then just couldn't get it done.  Ah well, onward...

Vintage caravan trailer ornament, handmade from felt and decorated with fabric scraps. With tiny felt bunting and buttons for the wheel and door knob.Colors are

http://patchworknplay.blogspot.com/2017/05/simply-new.html

scrap quilt - Google Searchscrappy quilt idea

String pieced half square triangles - another great scrap quilt! So simple yet cute and not too busy. Great use of scraps.

This is such a simple way to make a wonderful quilt while using up all those leftover strips.Finish It Up Friday ~ Scrappy Rectangles! | KatyQuilts

This is a fun strip-pieced quilt made by patty of the Kansas City Modern Quilt Guild.

Confessions of a Fabric Addict - Love this layout with all the scraps!!A great way to use scraps. Thin strips sewn together and then cut with a 60 degree ruler.

Welcome to finish it up Friday! Thanks for all the wonderful comments on my epic quilt top ! I appreciate each and every one!    Once again,...

All sizes | Fabrics N Quilts Scrap Quilt Challenge 2012 !! another view . | Flickr - Photo Sharing!
  
Are you inspired to get those scraps out? How do you sort them? Wait, do you sort them? If so, by color, size, theme, line, what? I really want to hear from you. I mean, geez, very few of you ever leave me a comment.  I like comments. And I love my bloggy friends. Today is a good day to leave a comment. Okay?