Showing posts with label #paintedquilts. Show all posts

Monday, September 14, 2020

Griffins Antiques and Main Street Market

I may have mentioned that I've decided to join lots of friends in a new adventure. There's an old antique store in Bunkie and a young family has purchased the building to turn into an artists/crafts market. I bought the smallest size available and will attempt to sell some of my work. I'm committed to four months of rent, so that means through Christmas. Hopefully, sales will pay the rent. 


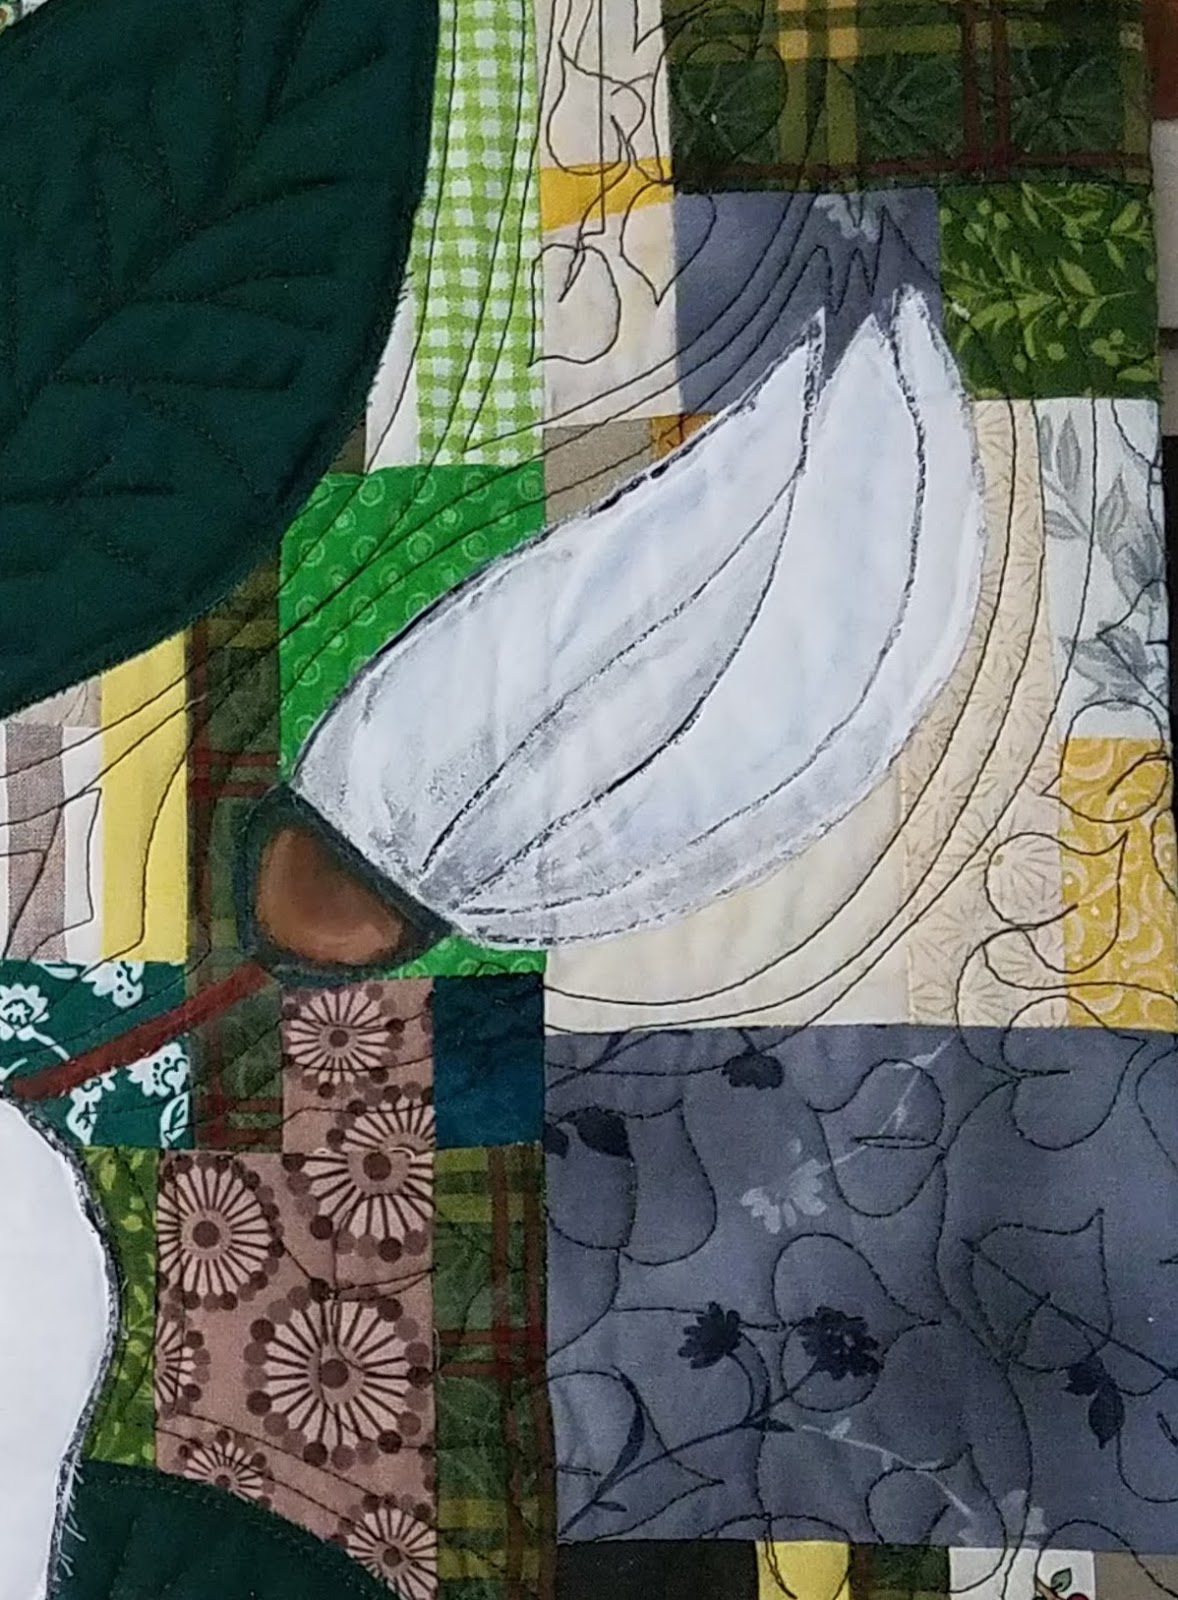
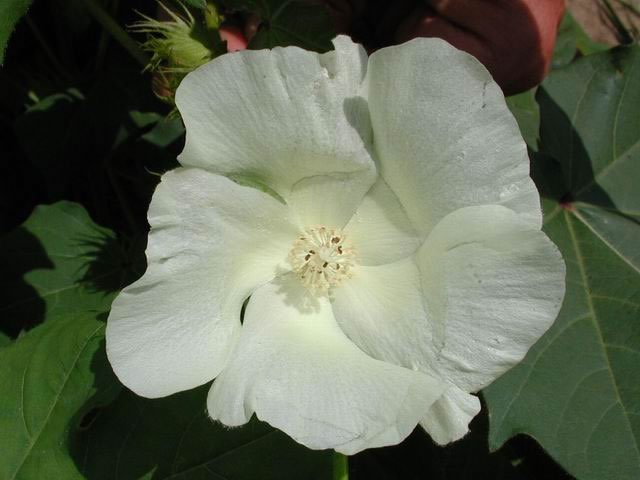
So what will I be selling? Well, I've decided to put out the cotton and magnolia paintings, perhaps a few of the stitched art pieces and some scriptural quotes. The newest pieces are the quotes. (I've been calling them simply "the quotes.") They started out as a fun, fast way to get some painting in. Quite by accident, actually. I went out to meet Rich in the shed, saw some scrap pieces of wood and picked them out. 

A little sanding and a good cleaning, and they made for fast canvas. At the time I had no idea what to do with them, but hey, that's how I roll. After painting sunsets/sunrises on them, I decided to add quotes. (Thus far no costs since everything was left over from other projects. Huge selling point, BTW.) When I ran out of pieces of scrap, I mentioned it and ask my guy to put some pieces aside as they  arrived. I meant arrived naturally, as discards from his projects.

He bought me a sheet of plywood. The good plywood (as opposed to MDF or cheap plywood.) Hmm, that's eating into my no cost budget!

So for a while now, I've been having great fun painting, searching for quotes, and relearning the Silhouette machine. Those are the quote pieces that I mentioned. I'll take pictures of the booth when it's all set up. I probably have about ten quotes and a couple of door hangers/welcome signs. I've also picked out about 10 or so lap/baby quilts that I will drape over a quilt rack. I really hope those sell, but who knows what people are looking for? Wish me luck!


Friday, May 8, 2020

Magnolia II ~~ art quilt finish

When I posted my finish on Tuesday, I knew that I was close to posting about this painting as well. It was complete, but drying seems to take forever. Then there are those photos that intimidate me so. But I'm persistent, if nothing else, and have something to share. 


Several people have asked me how I create these since it's an odd way to paint. So here's the short version. Start with a subject that can be isolated easily, so it almost has to be a physical object. Create a background using fabric (scraps work nicely). I think of it as making a quilt top. 


After loading the quilt sandwich onto the longarm, I plan and prep the painting area with gesso. Because you aren't painting the entire panel, plan carefully. I pencil in and quilt the outline of the subject. 


Now we're ready to move on to painting. I alternate between painting and quilting. I've discovered that one informs the other, and I tend to work improvisationally.  


An example of that improvisational work is this bud in the upper right corner. I decided to include it as I was painting the large magnolia and wanted it to be a secondary element, almost not noticeable. While I was working on it, I realized that the green stem receded into the background, so I repainted it in lighter browns that contrast more with the greens, yellows and browns of the background. 


And just like that, weeks later there's a painting ready for framing. Richard is wonderful about making frames, so as soon as trim and measure the work, he builds a frame--to 1/16 of an inch. (As if I'm going to manage that math!) Once a work is framed, I clean the painting by removing threads and touch up the paint as needed. How's that for a "quick" explanation? 

Tuesday, May 5, 2020

Magnolia I ~~ art quilt finish

I love combining quilting and painting--remember the cotton paintings? There's another here. It's a time-consuming joy that I don't think I'd have been able to appreciate back when I was working. Oddly, I started painting not long before retirement, so everything just sort of fell into place. Well, I've moved on from cotton to magnolias. 

This is my first attempt. I see so many flaws, but I've decided to let them go. If I move on, I can take the lessons with me to the next painting. 


While they are glaring in real life, they don't look so hideous in a photo. Getting depth was a struggle, but making the petals look cupped and curled...it feels impossible. But I'm determined!


And then there are the leaves to contend with. I need to work on those. But there's something I did that I love and that was to add ghost leaves in the background. I might do things a little differently later, but this idea really works for me.


There's another coming. I like it even more than this first. But I took an informal poll on Facebook and the two are about even in preference, so maybe I should show this one a little more love. What are you thinking of this one? What constructive criticism can you offer? I want to improve and knowing what to work on makes that job a bit easier.


Saturday, January 4, 2020

Looking back, preparing to look forward

To See Such Fun

We're in a new year it seems, so it's time to look back. I'll look forward in a day or so, but I need time to process last year. So much has happened, two new babies in the family, the loss of Richard's dad, my hospital stay and surgery. 


Another Red Feather from Red Is a Neutral challenge

Still, as it turns out, I've been quite busy in my little world. 


Dora and Diego 

Busy with what, you might be asking yourself (because I did set myself up for that question). My sassy answer is finish reading the post. But I'm not particularly sassy. 


Mr. Stripey made by Marley

I made or finished several quilts, taught a grandie to sew as she made her own quilt. All of these are quite small--lap or baby quilts, and a few are some tops that I simply quilted. That basket of tops waiting to be quilted is just a little lighter.


Pink Pieces
A Touch of Teal

We finally finished our bedroom and bathroom remodel, which ended the procrastinating to make (or buy?) a cover for the bed.


The Biggest Finish

The Biggest Finish required a great deal of time and effort to complete because, well, it's the biggest finish. It's bigger than a normal king so that it has a nice, long drape to hide that huge mattress. I don't remember the crazy measurements, but it may be the reason I'm going to therapy for this shoulder.


Dresden Teaching Quilt
So those are the quilts I made: from cutting to binding, even if they've been languishing for a year or four. 

Apparently I did some things that are not on my normal Things To Do list.
A quick rundown:

  • made monkey costumes for Beta 
  • learned to use the Silhouette machine and completed several projects
  • chaired the silent auction (and donated items) for the annual church fair
  • turned Daddy's old wooden ladder into two quilt ladders (thanks to Richard)
  • and I organized this thread cabinet he made for me (It's crazy how much time that took.)

I also ended my presidency for the Cotton Quilters' Guild, managed the CQG quilt show and managed a (first time) CQG sewing room tour, including my room.

Finally, I tackled Doctor Zhivago Yes, reading is generally on my list, but this book!

Retirement is paying off, and I started some new things that I'd like to pursue, such as
  1. GSQA meeting (circuit teacher)
  2. GSQA Pursuit of Excellence class
  3. BRMQG retreat (three finished tops)
  4. CFAL show (Baton Rouge)
  5. Quilters' Guild Acadienne show (Lafayette)
  6. Houston 2019

Reese's Quilt

And then there were a couple of customer quilts. This first one is for my sister, so it didn't pay much. :) But the ones below did and 
have a special meaning for me, as well. There's a fourth that I didn't get a picture of.


If you know anything about my world, you know there is always an art project going,either sitting near my chair, ready to put needle and thread to, or on the studio worktable. I'm still into art quilts. 


Bayou Des Glaises at Bordino Crossing
Cotton on Green 2

Cotton on Green 1

We have our aches and pains. Richard has some health issues, pain in his neck and back, plantar fasciitis, and an annoying frozen elbow. I fall apart, temporarily, then pull it together again--thank you, Bipolar Disorder. 


Cave in Yellowstone

But all of those are simply the result of living a longer life and we are grateful that it's not worse--there are, after all, so many, many illnesses and horrors in the world. 


Indigo Dusk

We feel blessed to be turning 60 (soon). To know that we are loved by God. To have healthy children, grand children, and great-grandchildren. To be able to help others. To be able to live the life we love.


Big Sky in Montana

Happy New Year! 

Tuesday, May 28, 2019

Another Cotton on Green ~~ Finished

On Friday I told you about the most recent cotton painting I created. What I didn't tell you is that I had loaded two canvases and worked on them side-by-side. Sister paintings, if you will. 


They have many similarities, but one is not their sizes. This one is 15 X 18. Another difference is this little blossom on the upper left side of the canvas. It just found its way there with no argument from me. I just sew without thinking when I work on these. Sometimes some interesting things happen. 


Related image
Cotton bloom - Google images
I decided that this serendipitous occurrence was something to take advantage of. So the blossom became a cotton blossom out of season. I quilted around it in the same way that I quilted around the cotton bolls, and let it take care of business. It may not be a cotton blossom, but it's not far off. 


Image result for cotton bloomThere are the right number of petals and it is white. Which, by the way, means it has not been self-pollinated because, once they are, they turn pink becoming a deeper pink as time goes by. 

In the next stage the flower dies and falls off leaving the green boll where the cotton grows. It is enclosed in green bracts which dry up and split open as the boll gets larger. Once the boll is fully mature, it will eventually fall off the stem. The seeds are in the fluffy cotton boll and are supposed to find their way to the ground, but most end up at the gin. But that's another post.


This cotton painting, then, has all the stages of the life-cycle of a cotton plant. Now that's serendipitous! 

Saturday, May 25, 2019

Cotton on Green ~~ Finished?

I've worked on this piece and another one for several days. I had built the canvases quite some time ago and set them aside. At the time I had another, more pressing project. Oddly, I can't think of what that was. 

Nevertheless, I discovered the stack of canvas pieces and decided to load them on the long-arm before something else jumped in front of me. I have a few more canvases in the stack, but I want to see what the green background looks like. 


I've been working on this series of cotton paintings and have eight or ten pieces. I haven't really named any of them, but I think I'll just number them. Luckily, I've written about them and can look up the order. 


With this piece I was going for a cleaner, less is more, feeling. I'm not sure it's working. I keep thinking there's something missing. If you realize it, please let me know. I will definitely rework it. Otherwise, my plan is to show it to my artist friend and ask her opinion. She will be absolutely honest with me! And I believe strongly in the power of constructive criticism and learning from others.

Oh, I have to give credit to my sweet husband for building the frames! We've created a pretty good system: I sew the canvas in no particular size--just whatever works for me for the moment--then choose one when I'm ready to paint. Once the painting is complete and dry, I decide on the dimensions and ask for a frame. This one is 16" square. He builds it, I mount the painting, and voila! we have a painted quilt. Isn't he the best?!


Here's another picture so you can help me with a comment. I really want to figure out what I'm missing. Plus, some of the other painted quilts in this series.
You can find the posts for these paintings here: upper left blue, upper right neutral, lower left neutral, lower right blue.

Tuesday, November 27, 2018

Thanksgiving, school props, and painting (Adam's finish)

Lots going on in the Marcotte lot. Firstly, we celebrated Thanksgiving in grand fashion with two meals on Thursday. One for the parents at noon because Papa can't handle too many people. About three is his limit, so we cooked a second meal for the kids for supper. 

That also gives the boys a chance to visit with their wives' families, and they can drop in on their grandparents a few at a time. No one gets left out this way. It's lots more work, but worth the extra effort since it means making things easier for the aging parents and it helps the kids arrange holidays with their families. Of course, there's nothing left of the food. By now everything has been eaten as leftovers or put in the freezer. 


Saturday and Sunday everyone just tried to rest and do a few things around the house. Adam and Richard had a special project going on. They built props for an upcoming school play. Can you guess which one? If you said A Charlie Brown Christmas, I'd have to agree because these are definitely CB props, but the real truth is that no one has really told me anything except to come see the cuteness. And, well, it is all kinds of cute.

Even better everything is made from left-over wood from a job or previous project. Even the mailbox is recycled. We replaced ours a few weeks ago and it had not found its way to the trashcan for pickup. Apparently we generate more trash in the fall, when we tend to purge the most, thanks to the cooler weather.

Adam retrieved it from somewhere, banged the dents out (it had been run over by a tractor) and mounted it on a freestanding pole. Then he painted it a very bright yellow. The flag was missing, so he even built a wooden flag that moves up and down. 

And now we're on to my current project. I'm working on another cotton painting. It's much like one in neutrals, beige and brown that I wrote about here. I also painted two in blues and wrote about those here.

I didn't like the beige one until it grew on me, then it became my favorite. I planned on painting a few using a green background but that hasn't happened. I supposed green needs to be higher on the list. At any rate this one is still a wip. 

The cotton bolls are still too dark and I need to add to the stalk. Cotton plants, you see, have many sharp limbs that do not bear unless the earliest flowers or seed pods are lost--as in eaten by a cow or destroyed by a storm. Then the plant is poised ready to put out new seed pods as soon as the early ones are lost.

It's interesting how much you can learn about a subject when you begin a "little" research just so your art is more authentic. Anyway, I'll show pics when the painting is complete and the frame is complete, and I pair the two. That may be a week or so, since my husband insists on making frames as though they will be seen from the front of the artwork. They are not but he's a perfectionist. And I am asking for a favor, so I guess we'll wait for a perfect frame.


In case you missed the pictures I took at IQS, all the posts are here:

Houston 2018 International Quilt Festival {page 1}

Houston 2018 International Quilt Festival {page 2}

Houston 2018 International Quilt Festival {page 3}

Houston 2018 International Quilt Festival {page 4}


Houston 2018 International Quilt Festival {page 5}