Showing posts with label handmade. Show all posts
Monday, March 23, 2020
Face Masks ~~ finishes
Yesterday's SQI was about making cloth face masks for health care workers and patients since there appears to be quite a shortage. Today the president said there would be ample supplies shortly, including face masks. I won't argue with the president. I'll just say I've made a few masks and have plans to make more.
These four are for my sister, Laura. Her chemo treatments wreak havoc with her immune system, and she must wear a mask every time she goes outside.
I realize that she'll probably need to wear the CDC approved masks while in the clinic or hospital, but at home or in the car, she can wear one of these. Since she leaves home at least once or twice a week, this will help her to save masks for when she knows she'll encounter people.
These are two-sided so that she has twice the options. She loves flowers but may not always want flowers splattered across her face. Though now that I look at them again, the backs of two are tiny flowers. Well, they'll have to do since the envelope goes out tomorrow. I'm used this PDF pattern but I think I'll try this pattern to decide whether I like it more. Neither one looks difficult and the first ones sewed up pretty fast. Are you making face masks for family or organizations? Do you have a great pattern? Share a link in the comments.
Wednesday, January 15, 2020
Pin It Weekly #302

The Lincoln MQG has this adorable planner cover that threw me down a rabbit hole of crafty things I'd like to make. Here are a few of the other pins I couldn't resist in that rabbit hole.
Susan Sweeney did me the favor of pinning a few more of these craft items. Which I also pinned to "craft diy make."
Emily Taylor has some interesting pieces of furniture pinned.
And finally here is The Cheeky Cognoscenti with some fun applique blocks.


And that's today's PIW. Have a great week!
Thursday, January 2, 2020
Pin It Weekly #301
Geez, I'm struggling. This bout of depression is really sticking to me, but I'm determined to just wait it out until it gets out. In the meantime, I have managed two minutes in the studio, some babysitting, and some pinning. Yes, I know, but there's been quite a bit of waiting in doctors' offices, so ....
What have I been pinning you ask? Well, I'm not quite over Christmas. I know others have put away their trees and packed up their pretties, but I'm just not ready. I want to wait and enjoy them when the blues are a little more rosy. Take that, depression!I'm kind of interested in these salt dough ornaments. They look cute and easy.
I'm really into all of these little baubles and bags and beauties. Isn't that little coin purse above fabulous? And the birds!

Saturday, December 28, 2019
Christmas continues...
I finally got into the studio today. I didn't know what to do, except clean house, but what fun is that? So, as we say in French comme ça va (as it goes), I decided to start a new project. New projects generally create messes, so as we also say comme de fait (as it does) I made the already big mess beaucoup plus much bigger.
But the mess is worth it! Because look what I pulled off. Today. I know. It is after Christmas. That's okay. I just had an itch. It's been weeks, WEEKS I say, since I went into the studio and turned on a machine.
Today would have been my dad's birthday, so I figured I needed a little creativity to counteract the tears. It worked. Making a few little happy things and praying a rosary tonight are two great ways to fight the depression of the holidays.
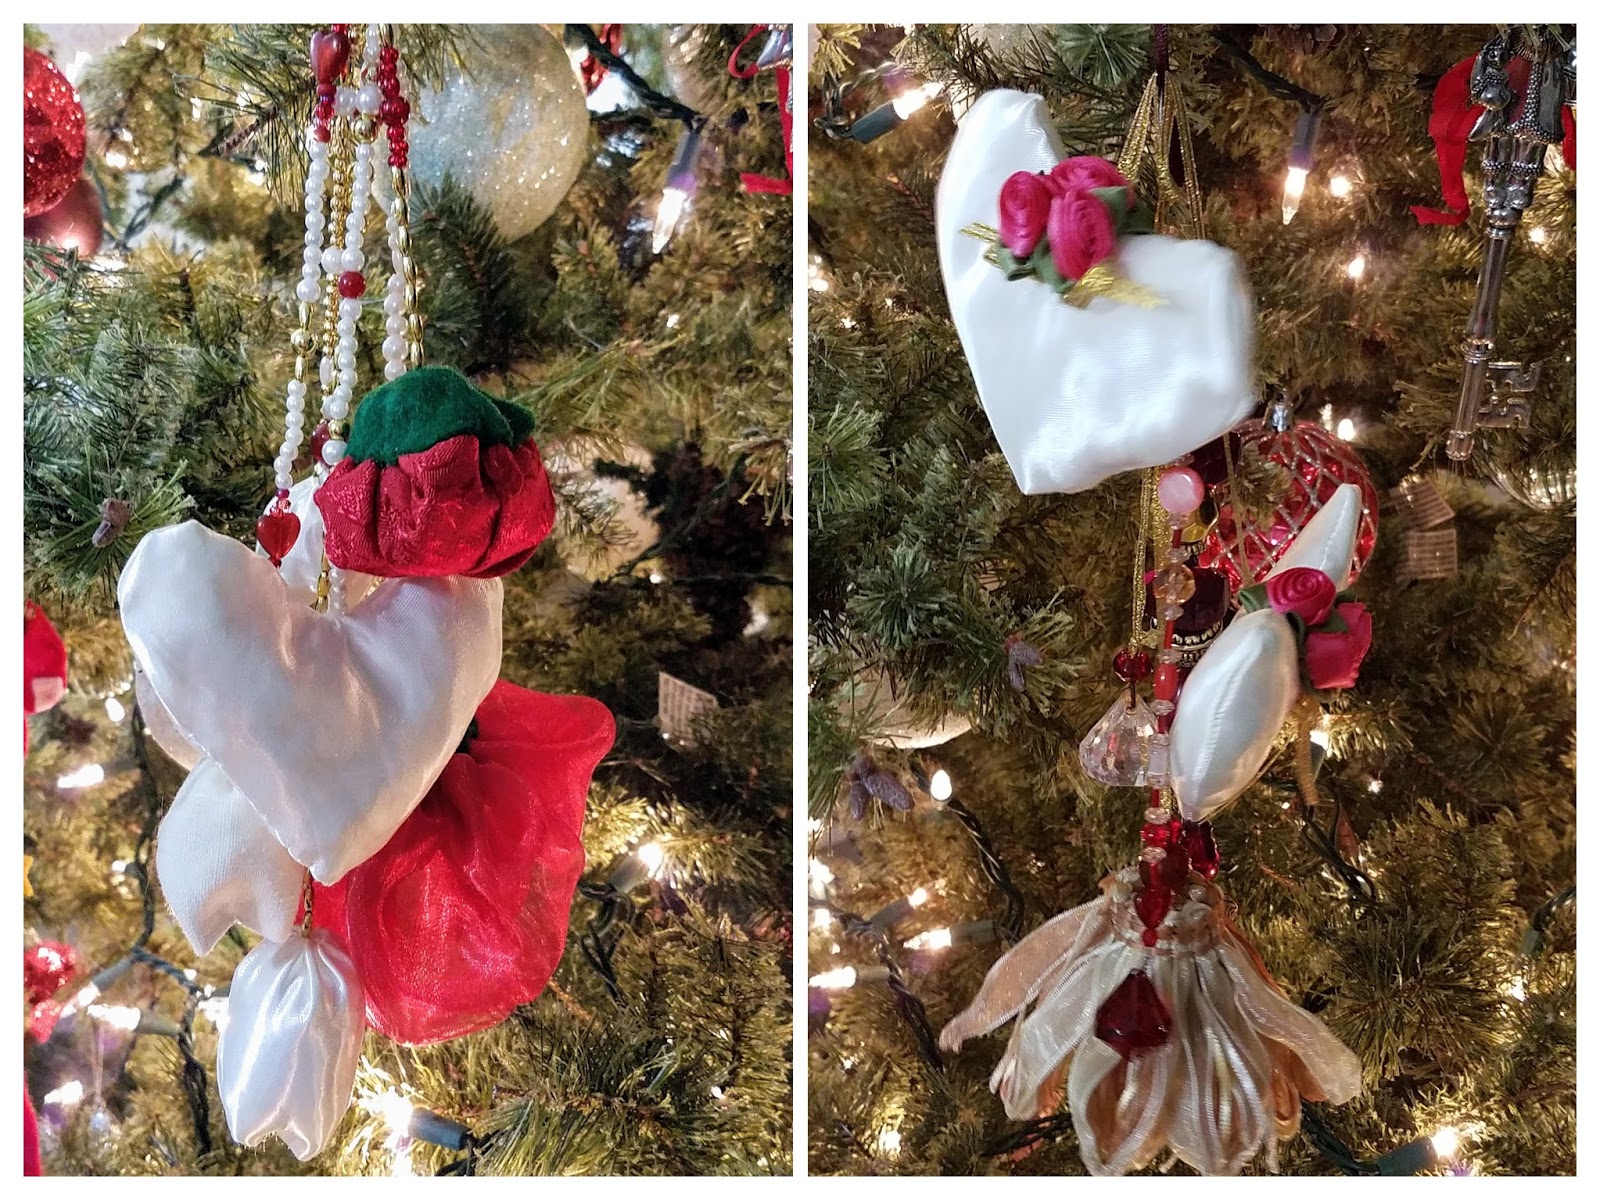
And look how happy! A couple of little hearts. Some strings of beads. Red flowers. Shimmery satin flowers.
It took me almost all afternoon. I got stuck on those red flowers. That's what happens when you don't have the correct materials. I really wanted some red flowers. Three attempts in, I decided to use the smaller one. Then finally, I remembered the basket of sheer fabrics. That worked beautifully.
I have bolts of white satiny fabric, so I used it to make some little hearts, two I embellished with ready-made trims from a drawer. And with some small squares, I made what might be closed tulips. They are cute in person, I'm not sure about in these pictures.
Some gold ribbon serves as string for one of the pieces and strings of small beads work for the other one.
The tassel on the right is actually a ribbon trim that I just sewed into a circle and added beads to create a head. The strings of beads on that piece are the ones I strung before Christmas. I decided that they weren't showy enough as single strands and planned to made a few more to make into some sort of tassel. Well, here's the tassel I came up with.
Each piece has six or seven strands of decoration and every strand is different, which is what I like most about them. They look great with the purchased decorations but add some uniqueness to the tree. They may even add a little elegance but, being handmade, they are also simple and homey.
Can you guess where I got my inspiration?
But the mess is worth it! Because look what I pulled off. Today. I know. It is after Christmas. That's okay. I just had an itch. It's been weeks, WEEKS I say, since I went into the studio and turned on a machine. Today would have been my dad's birthday, so I figured I needed a little creativity to counteract the tears. It worked. Making a few little happy things and praying a rosary tonight are two great ways to fight the depression of the holidays.
And look how happy! A couple of little hearts. Some strings of beads. Red flowers. Shimmery satin flowers. It took me almost all afternoon. I got stuck on those red flowers. That's what happens when you don't have the correct materials. I really wanted some red flowers. Three attempts in, I decided to use the smaller one. Then finally, I remembered the basket of sheer fabrics. That worked beautifully.
I have bolts of white satiny fabric, so I used it to make some little hearts, two I embellished with ready-made trims from a drawer. And with some small squares, I made what might be closed tulips. They are cute in person, I'm not sure about in these pictures.
Some gold ribbon serves as string for one of the pieces and strings of small beads work for the other one.
The tassel on the right is actually a ribbon trim that I just sewed into a circle and added beads to create a head. The strings of beads on that piece are the ones I strung before Christmas. I decided that they weren't showy enough as single strands and planned to made a few more to make into some sort of tassel. Well, here's the tassel I came up with.
Each piece has six or seven strands of decoration and every strand is different, which is what I like most about them. They look great with the purchased decorations but add some uniqueness to the tree. They may even add a little elegance but, being handmade, they are also simple and homey.Can you guess where I got my inspiration?
Wednesday, July 27, 2016
More of the Little Things ~~ Finishes
As I was sewing earlier in the week, this mess kept getting in the way. When I had to rip out a perfectly good seam because a scrap had attached itself into the seam, I decided that enough was enough! I had to do something about the scraps that were spilling over the edges onto the floor and now into my sewing. I thought about finding a bucket in Richard's shed, but that would have required lots of cleaning and washing. Nah. I'm not one to wash a ratty old plastic bucket when I can whip up one in very little time.
And, of course, since it's to be a scrap bucket, I made it from scraps. Some of those very ones that were bugging the heck out me by getting in the way.
I really wanted a bucket. One that would hold its shape and sit up straight and tall so that when I'd toss scraps in the right direction, I'd get it into the bucket. Maybe the ugly plastic one would have worked after all. But this one is much prettier.
To make it sit up straight and tall, I used four layers: the backing (which doesn't show in this picture) a layer of heavy Pelon interfacing, a layer cotton, and my stitched together scrap fabric.
I quilted it lightly using a wavy stitch that now looks as though it goes around and around the bucket.
I tried to keep the inside clean and low key so that I wouldn't be grabbing at a fake scrap--one that was sewn into the bucket. Instead, the inside is a light gray and off-white. It's pretty big also, this dark picture show what a pack of needles looks like inside--small.
One reason to use fabrics two or three times, is to give the bucket a cohesive look in the overall design. I really do like this little project. 
Doesn't it look good on my sewing table? Now I have a large scrap bucket on the worktable and a small one on the sewing table. I wonder if I really have that many scraps...
This did not make a dent in the scraps! Well, not much even though I used scraps for every bit of it, including the batting, Pelon and backing fabric. Because there are so many scraps, I thought I'd make a few more pincushions. I know, they don't use up much scraps, but I am working on a large project and didn't want to get too far away from that. So here are some pictures of the pincushion that did get finished.
I know, that's lots of pictures for a little pincushion and a quilted bucket, but I like them so! What do you think? What projects are you working on?
Linking up with
Crazy Mom Quilts
Sew Fresh Quilts
Confessions of a Fabric Addict
Sunday, December 13, 2015
Sunday Quilt Inspiration: book paper ornaments
I'm not sure today's inspiration will get you making quilts but they may move you to make ornaments for your tree. There are so many ideas on Pinterest alone that I doubt anyone could attempt them all, so I had to pick and choose.
I decided on these because I like them and they seem relatively easy. I'm smart enough to know that at this late date a working girl will not be able to begin and finish an involved time-laden project. I may not be able to begin (much less finish) an easy one.
However, someone sent me a link that I almost could not escape from and thought, "Well, if nothing else, share it!" So here we are enjoying (I hope) some beautiful ideas for quick, easy DIY ornaments to add to your already-complete tree.
I am of the idea that my tree can not have too many ornaments. I lose a few from breakage and from, well, losing them. The grands love to play with a few and I can't resist letting them enjoy the few things that are pretty in our little home. That means that I need to replace a few each year, but while I have quite a few bought ornaments, my favorites have always been the handmade ones, regardless of whose hands did the making.

![]() |
| one of my favorites...easy! |


![]() |
| okay maybe not so easy |

Any Christmas shape you want--stars, angels, bells, trees, birds, etc.--will work for this design. Just cut out several of the same shape (cookie cutters are great stencils), glue or staple them together exactly in the center then fold and fan them so they look like this. Add a hanger and you're ready to go!

Okay, no quilts, but how about some DIY easy-sewing ornaments?


Many of these can be found on my "Merry, Christmas" board. I found others by searching DIY fabric Christmas ornaments.
Subscribe to:
Posts (Atom)