I came up with a design for some small banners to use as Christmas ornaments.
Since I wasn't sure how they would come out, I decided to use burgundy fabrics so that they would coordinate with my own tree. I figured that I'd use them if I didn't like them enough to put in my booth at the craft fair in Natchitoches.
I suppose they'll work either way! I'm pretty happy with these and plan to make quite a few more for the craft fair.
Because they are so quick and easy, look nice and can work with almost any decor, I thought you might want to make a few for your own tree. Of course, you could put a couple on a wreath instead or use them to decorate some other place in the house.
Start with three pieces of fabric. The solid pieces are 5 inches by 9 1/2 inches. The print is 3 inches by 9 1/2 inches. I also used a small scrap of metallic gold fabric backed with iron-on adhesive for the letters. For one banner I used a piece of fabric about 3 inches square.

Fold down about 1/2 inch of the long edges of the solid fabric to the back and press. Find the center of the short edges of the print fabric and one of the solid pieces. Match the centers and pin the print on top of the solid.

Pin in place and edge stitch.
 Find the center of the one short edge and using your ruler, mark a 45 degree point. If you don't have a 45 degree line, simply use a regular sheet of typing paper to find the angle you need.
 Fold one edge of the paper on the point so that the two edges match perfectly. This fold will be the center line of your point. Now match the folded line to the center of the banner. Mark your angles and cut.
Now your ready to add your letters. Press the adhesive to the wrong side of the letter fabric. On the paper side of the adhesive, draw your letters remembering to turn them backward.


I used my grandchildren's plastic stencils that are one and 1/2 inches then cut the letters freehand. If your decor allows for informal letters, you can draw and cut the letters freehand.

Once the letters are cut out, remove the backing and place on the banner to your liking then press in place.

 Now you can sew on the back of the banner. Place the backing on, right sides together and pin in place. Trim the corners to match the front of the banner, and sew completely around the banner leaving the top edge open for turning. Trim off the points of each corner.
Turn the banner right side out and use a dull pencil to push out the corners. Press.
Fold the top edge to the back one half inch to form a casing for a small dowel or other hanging device. I used 7 inches of 12 gauge wire to form a dowel with scrolled edges, then tied on a 12 inch ribbon to hang the banners. You might consider adding small tassels to the point to dress up the banner even more.
Part two of my DIY tutorial on making tassels!

Today is about embellishing the basic tassel we made yesterday. You can use any manner of items to embellish your tassel. I've used ribbon, slivers of cut fabric, beads, cording and charms. Search through your embellishments for unusual items. Attaching the embellishments will be easy once you learn the basics.
 To add your embellishments you will need a needle, thread (either match the color of the tassel or use clear nylon thread) and a thimble or small needle nose pliers.
Let's begin by discussing the parts of the tassel which, I should add, are of my own terminology. The very top string is the hanger. It holds all the threads together to form the head so that you can fold and tie on the horizontal thread, or waist. The loose threads at the bottom are the drop.

The easiest embellishments to add are the longer ones, such as ribbon, cording, etc. In the tassel at right, I added the ribbon when making the basic tassel by simply laying the ribbon down first, then adding the thread. When I folded the tassel to tie on the waist, I made sure to fold with the ribbon on top.
To add ribbon after the basic tassel is made, measure the drop and double the number. This is the length you'll need to cut the ribbon. Find the center of the ribbon and finger press. Open the ribbon and tie it on with the fold at the waist. Fold the ribbon down and wrap the thread around it so that it covers the fold and holds the ribbon down. And there you are!
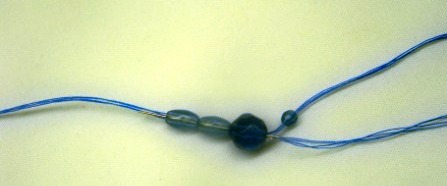
Now let's add a few beads. Thread your needle with about 18 inches of thread and knot both ends so that the thread will be doubled. Slip the needle into the tassel from the bottom of the waist inside the threads of the drop so that the knots are buried. The needle should come out of the tassel through the waist.
 Load some beads onto the needle and slide them along the thread close to the tassel. Now add one small bead and slip the needle back through the first set of beads and pull through. The beads need to touch the tassel waist but do not pull too tightly or they will stick straight out rather than hang down along the drop of the tassel. Make a small knot at the base of the beads.

You can add as many strings of beads as you want by simply running the needle through the waist to where you want the next string and repeat the process.
In the picture below, I added short strands of fat beads between long strands of slim beads. In the black and white tassel, I mixed thread of both colors then added striped beads to the sides and inside the tassel so that they just barely show below the drop.
 Have fun making and embellishing your tassels.
Send photos of your finished to tassels to mary.marcotte@gmail.com, and I'll post them on my blog. It will be fun to see what you come up with and the rest of us will find inspiration in your work!
Please leave comments letting me know how you like this tutorial or if there are parts that are confusing!

Thanks for visiting!
Happy Quilting,
Mary
 Since I don't have any real sewing to write about, and since I've been meaning to write this tutorial for a while, I guess I'll just get to it now.
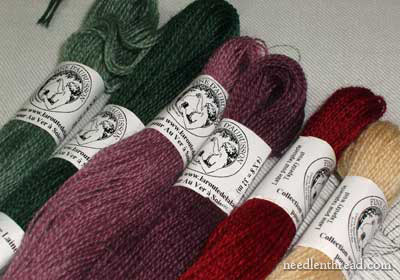
Making a tassel is really quite easy. All you really need is a good heavy-weight thread, such as crewel thread. It's used for embroidery and crewel work and is heavier than embroidery thread.
Choose a color that will work well with your home decor, and you can use your tassel for any number of decorating projects: stitch, glue or tie it on to

- pillows
- curtain tie-backs
- Christmas tree
- wreath
- teapot
- cup
- photo frame
- book mark
- cell phone
- zippers
Once you've chosen your thread, you might gather a few other items to embellish your tassel: ribbon, beads, cording, and thin fabric strips. You can stop once the basic tassel is complete or continue and add some of these embellishments to the tassel. Today's tutorial will cover the basic tassel. Tomorrow I'll tell you how to add beads, ribbon and other embellishments.

 Step 1: Slide the paper rings off the skein of thread but do not unroll the thread. It's easiest to handle while still twisted and is pre-measured. Your tassel will be half the length of the skein. Gently unwind about 12 inches of thread and cut off. Cut this piece in half. Measure the skein and find the center, then tie one of the 6 inch threads very tightly around the skein at the center point.
 Step 2: Cut the threads apart at the folds on each end of the skein. Fold the entire skein in half so that the center thread is on top of the tassel. Tie the second piece of 6 inch thread around the tassel about 1/2 inch below the fold tying tightly. Wrap the end of the thread around several times and tie off. Use a needle or pin to tuck the ends into the center of the tassel. Tie the two ends on the top of the tassel so that you have a hanger. Snip off the extra edges.
You now have a basic tassel. Tomorrow we'll add beads, cording, or ribbon to the tassel.


 Find the center of the one short edge and using your ruler, mark a 45 degree point. If you don't have a 45 degree line, simply use a regular sheet of typing paper to find the angle you need.
  Fold one edge of the paper on the point so that the two edges match perfectly. This fold will be the center line of your point. Now match the folded line to the center of the banner. Mark your angles and cut.


 Now you can sew on the back of the banner. Place the backing on, right sides together and pin in place. Trim the corners to match the front of the banner, and sew completely around the banner leaving the top edge open for turning. Trim off the points of each corner.