Showing posts with label embellishments. Show all posts

Monday, December 17, 2012

Three Little Quilts

Once upon a time there were three little quilts who all wanted to go to a special place where they could find new homes and help raise money for Alzheimer's research.

I started these little quilts two weekends ago and wrapped them up last week.  They will go to AAQI after the holidays.  I'm hoping to add another one or two before sending these off.  My goal was to get 12 to AAQI in 2012.  I don't think I'll quite make it, but I'll do what I can over the holidays to get a few more finished and on their way.

I discovered that making a couple of quilts is easy if I begin as though I'm making only one large quilt.  Each one has the same background fabric but the flowers are different.

To avoid putting flowers in the way of my cutting, I measured the background and drew a line using ink that vanishes when pressed.


From that point on, I just played, designing and dropping in flowers as I went along.  I tried to stick with the rule of three, but it's not a hard and fast rule, so I didn't worry it to death.   

After pressing the flowers into place, I went to the Bernina and stitched them down using either the BSR (Bernina Stitch Regulator) or one of the specialty stitches.  

On the pink flower below, I used two of the specialty stitches and like the lacy look that I achieved.  On the purple straw-flower beside it, I used the BSR and ran over the petals over and over adding several layers of thread to darken the petals and add dimension.

On some of the flowers I zigzagged the edges but on others I left the raw edges exposed.  The two toned flowers in this quilt are a good example of this.  While I sewed the purple petals, I left the blue without stitches because the other parts hold it down.

The little yellow flowers on the vine were a bit difficult because they are so small.  I planned to have more them, but once I realized how difficult they are to work, I dropped the idea and added another pink flower to fill the space.

In the end the three quilts are just the right size for AAQI, which I discovered returns any quilts that are 1/4 inch over the 9 X 12 inch limit.  I got two back earlier this month from the last group that I sent.  I was able to trim one down, but the other will not cooperate.  Trimming it takes too much away from the motif, so that one has become a small quilt in my studio.  I measured these more carefully and made sure to leave enough wiggle room for the binding.


I hope you come back tomorrow for a visit when I hope to announce the winner of the Blog Hop Party giveaway.  

Happy Quilting,
Mary

Wednesday, October 3, 2012

Blue brooch

When my bloggy friend, Jenclair, at Bayou Quilts and Dolls wrote about her encrusted pieces which are embroidered, I was intrigued.  She mentioned that she's interested in turning some into brooches, which I love, so I decided to give it a whirl.  My effort is not even close to the beauties she creates, but I'm not disappointed either.

She made a few suggestions when I commented and told her about my interest.  Those definitely helped, but I'm not quite as brave as she is, so my piece is not encrusted at all the way hers are.

I started with a small circle drawn on white muslin.  I embroidered simply motifs because my skills have lain dormant for many years. I really love blue, so I used a variety of blue threads.  

I've made a few beaded brooches before and like those, so I planned from early on to include beads.  I figured that if nothing else, I could cover any bad embroidery with beads.

I wasn't so disappointed in my stitches that I felt an overwhelming need to cover them, though.  So while I did couch some beads in the center of the piece, the rest of the beads encircle the embroidery.

As is my way, once I started couching beads down, I had a difficult time stopping.  I tend to drop them in even circles that get continuously larger as they are added.  By the time I get to the edge of the piece, though, I've begun piling them on.  It's necessary to go around the edge also.  


While I used mostly blue glass beads, this brooch wasn't too particular and any bead in the vial was fair game.  It just happens that there were a few purple, some green, and two or three clear beads.  I love this brooch and can barely wait to wear it on Saturday at the Quilt Show.

Sunday, February 12, 2012

How to Attach an Eyelet

A few posts ago, I mentioned that I'd modified a dress by removing the zipper and adding eyelets so that the dress would fit more comfortably and also to change the look a bit.  The young lady to whom it belongs was very happy with the new changes.  


Today I thought I'd write a tutorial on how to add eyelets.  Let's begin with the tools: I've assembled several items: not all are absolutely necessary, but they'll make the process a bit easier.  You'll need a hammer (not shown) scissors, measuring tape or ruler, pencil, small block of wood, hole punch and eyelets.  The needle-nose pliers and eyelet tool are great additions if you have them.  


The eyelet tool that I show here is great because it both cuts and applies the eyelets, but it's rather expensive.   That said, I wouldn't purchase one unless I planned to use it many times.  If you do make the purchase, be careful to purchase the right size for your project.  This one is too small the eyelets that I used on the dress I wrote about.  It does apply two sizes of very small eyelets though.


Another option is to use the smaller tool that often comes with the eyelets packaged as a kit.  The open end cuts the hole and the other end bends the eyelet piece.


Let's begin, shall we?  I recommend that you make your first attempts on some scrap fabric of the same weight and thickness as your real project.  


Eyelets come in pairs.  One piece has a longer shank than the other, this is the one that goes on the right side of the garment.  


Begin by punching a hole in the fabric exactly where you want the eyelet.  When working on a garment, you should first carefully measure and mark the fabric.  Generally, the eyelets are equally spaced just as in marking buttonholes.  


The small tool above has two different ends: a sharp one with a hole, which cuts the hole in the fabric, and a solid end that bends and shapes the eyelet pieces so that will lock in place.  To cut the hole place the fabric on the block of wood, place the tool on top of the fabric so that the mark is in the center of the hole.  Use the hammer to tap the tool into the fabric.  


Slide the long-shank eyelet into the hole.  Turn the fabric over and put the eyelet on the block of wood to protect your work surface.  Add the short-shank eyelet on top of the first eyelet piece.  They will fit one inside the other.  


Now put the tool on top so that the solid end fits into the two eyelet pieces.  Hold level and tap with hammer.  This time you'll have to tap fairly hard. When the eyelet seems to be finished, test by trying to pull the two pieces apart.  The finished eyelet should be tight against the fabric all the way around the edges.  If there is space left around the edges, you will need to add stabilizer or interfacing to the fabric.  


 It definitely takes some practice.


The end result, though, can be stunning!  


Happy sewing,
Mary

Thursday, February 2, 2012

Libby Lehman is a well-known quilter whose work is absolutely stunning.  As a teacher, she is hilarious and while she enjoys joking on stage, she seems serious about her craft, her Bernina, her teaching--just about everything she jokes about is actually a serious subject.  When asked how many projects she has going at a time, Libby said that she works on one project from start to finish.  On her website, www.libbylehman.us she says basically the same thing:


"I work on one quilt at a time, from start to finish (“finish” means the slides are taken and in the notebook). This discipline helps me to focus in on each quilt as a distinct entity. It also cuts down on the clutter, both literally and figuratively. Part of my creative process involves an ongoing dialogue with my quilts; too many voices trying to talk at once would be distracting. It usually takes from a few days to a month to complete a quilt."


Her quilts, as you can see, are just stunning.  I love the many embellishments she includes, from the shimmer of the sheer fabrics to the sparkle of the metallic threads.  These quilts are meant to shine and grace a wall like a painting from one of the masters!  


I hope you enjoy this quilt show as much I enjoyed snapping the photos.  (I just wish my photo skills could do them justice.)


Do visit her website and check out the quilt gallery where there are even more beautiful quilts to see! 

Wednesday, September 28, 2011

Tassels Times Two

Part two of my DIY tutorial on making tassels!


Today is about embellishing the basic tassel we made yesterday.  You can use any manner of items to embellish your tassel.  I've used ribbon, slivers of cut fabric, beads, cording and charms.  Search through your embellishments for unusual items.  Attaching the embellishments will be easy once you learn the basics.


To add your embellishments you will need a needle, thread (either match the color of the tassel or use clear nylon thread) and a thimble or small needle nose pliers.


Let's begin by discussing the parts of the tassel which, I should add, are of my own terminology.  The very top string is the hanger.  It holds all the threads together to form the head so that you can fold and tie on the horizontal thread, or waist.  The loose threads at the bottom are the drop.


The easiest embellishments to add are the longer ones, such as ribbon, cording, etc.  In the tassel at right, I added the ribbon when making the basic tassel by simply laying the ribbon down first, then adding the thread.  When I folded the tassel to tie on the waist, I made sure to fold with the ribbon on top.  


To add ribbon after the basic tassel is made,  measure the drop and double the number.  This is the length you'll need to cut the ribbon.  Find the center of the ribbon and finger press.  Open the ribbon and tie it on with the fold at the waist.  Fold the ribbon down and wrap the thread around it so that it covers the fold and holds the ribbon down.  And there you are!


Now let's add a few beads.  Thread your needle with about 18 inches of thread and knot both ends so that the thread will be doubled.  Slip the needle into the tassel from the bottom of the waist inside the threads of the drop so that the knots are buried.  The needle should come out of the tassel through the waist.  


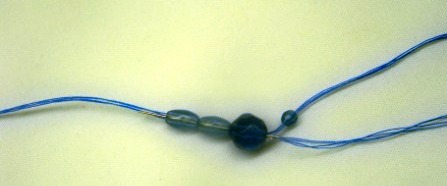
Load some beads onto the needle and slide them along the thread close to the tassel.  Now add one small bead and slip the needle back through the first set of beads and pull through.  The beads need to touch the tassel waist but do not pull too tightly or they will stick straight out rather than hang down along the drop of the tassel.  Make a small knot at the base of the beads.


You can add as many strings of beads as you want by simply running the needle through the waist to where you want the next string and repeat the process.  


In the picture below, I added short strands of fat beads between long strands of slim beads.  In the black and white tassel, I mixed thread of both colors then added striped beads to the sides and inside the tassel so that they just barely show below the drop.


Have fun making and embellishing your tassels. 


Send photos of your finished to tassels to mary.marcotte@gmail.com, and I'll post them on my blog.  It will be fun to see what you come up with and the rest of us will find inspiration in your work!


Please leave comments letting me know how you like this tutorial or if there are parts that are confusing!


Thanks for visiting!


Happy Quilting,
Mary