Showing posts with label thread painting. Show all posts

Thursday, November 1, 2018

Dropcloth ~~ a modern finish

I decided about a month ago that I wanted to enter a few quilts into QuiltCon. Hopefully, the jury will accept them, but for now I just want to try. I tried last year but missed the mark, so this year I decided to try a different tactic. I'd make a quilt especially for this purpose.

To that end, I read the rules. Several times. Then I pondered and mulled and thought. And I read the rules again. I decided. One quilt would meet the requirements of the two-color challenge, and the second would shoot for the requirements of the small quilt entries.
Small quilts – A modern quilt that measures 36" or smaller per side. The quilt can be any shape as long as it does not exceed the size limit on any side.


Hmm, that seems doable. So I had an idea. I once saw a painting on a sitcom that I liked. I don't even know if the show is still on the air, but I remembered some things about the painting that I really liked.  A couple of circles in lime green and orange-sherbet colors were important. So I started there and planned an asymmetrically pieced, neutral background so the colors would really pop. 

Then there was a problem. The quilt didn't want to be what I had in my mind. It wanted to be a drop cloth. You know, the kind of cloth painters put on the floor to catch drips. That's what the quilt wanted, and who am I to argue? I let it be a darn drop cloth. The circles became the rings that are caused when paint pools at the bottom of the can. A few droplets appeared. The quilt was doing its thing. 

Since paint can look different when it dries in different ways or when the light hits it, I played with colors using fabric and threading painting. But still it just looked like circles and blobs, and the quilt didn't really want that.

So I added a bit of a footprint. As though the painter stepped on the edge of the cloth while working. I just pulled off my own shoe and used it for a pattern. I really liked that. The footprint made the difference. But when two construction workers come in and they don't recognize a drop cloth when they see one, maybe it's not a drop cloth. Yet.

So I pointed out the obvious and they sort of agreed with me. "Except the thing is too clean, and who knew that was a footprint anyway? It doesn't even have a heel," he said.


So I added another footprint. Bigger. A bolder footprint to satisfy a hard-headed son. I used his dad's shoe for size and decided that maybe this guy stepped in or on the blob just for effect. And I was really happy.


Happy enough that I started quilting it and finished before another construction guy could come in and dash my joy. And as soon as I had a good 200 or so stitches in, I had the brilliant idea that maybe this is one of those drop cloths that you can see through. So I removed some of those first stitches and started building blocks with different motifs in each. Kind of a changing tile floor. Or maybe this is a showroom floor. I'm not sure, but it's definitely a floor because a construction worker came in and recognized the drop cloth lying on the back of the sofa. A different son. One who has a better imagination and knows what he's looking at when he sees a drop cloth.

Sunday, August 10, 2014

Sunday Quilt Inspiration: THREAD

Do you have a tread addiction?  You know it!  Come on, admit it.  We all do.  I can't tell you how many spools and cones of thread I have--mostly because I don't know!  I have a wall of thread, a shelf of thread and two (yes, 2) nice little organizers....all filled to bursting!
get organized!  here's how to make a thread rack to hold all your spools - - Sugar Bee Crafts: Thread Rack - tutorial

Long Arm thread storage

Craft room thread storage...easy to see and find your threads - hand on inside of cabinet

sewing room storage systems | Here's another major purchase from a store closing. Great deal but so ...

sewing thread: reminds me i have to organise mine

Pegs for yarn bobbins

Linen yarn thread ~ namolio

yarn!

Repeat Crafter Me: Yarn Cake with a Crochet Candle

(purchase yarn)

And now for some gorgeous projects.  Love the little pincushions here, then check out the detail on the quilts.  Some (though not all) are photographs printed on fabric then quilted and thread painted.  Amazing work!


Crocheted lavender sachets... what a great way to play with colours...

Cinde Hoppe

Sewing Art

I am in love with this quilted art by Kate Themel...and, of course, it's not for sale!

http://www.road2ca.com/2012winners/images/front/10400.jpg

Thread painted beauty -  amazing. You have to look closely to see the work.

A 5" x 7" thread painting based on a photograph taken by my friend, Edgar Woodfin of a North Carolina river near Tuxedo, North Carolina. The background is painted Habutai silk and the thread painting is done in rayon threads using a straight stitch.  It is matted and framed. By Jo Raines

Ulla's Quilt World: Quilted tree wall hanging - she knows how to paint with thread.  Look how she did the rocks.

"Starling of Botswana" 21.75"w x 33.5"h  Another interesting bird from Botswana is also thread painted and free-motion quilted by Barbara McKie fibre revolution.com

"Splash" by Annemieke Mein.

satsumastreet:  Hand quilting and sashiko, detail from the Tokyo International Quilt Festival 2011

look at all the fibers couched on over the piecework on the bottom part of this...would be great to add beads and button too.

Saturday, May 17, 2014

A Finish and a Nap???

I hope you had as wonderful and productive a day as I have.  I started and finished one piece.  Then worked on another piece that I've had on the long-arm for a while.  

And I climbed in the hammock in our backyard for a bit of relaxing.  Our summers are much too hot for lying outside, so I'm trying to take advantage of the beautiful sunshine and cool breezes that we've been getting.

This is a very rare selfie!  I don't like being in front of the camera any more than I like taking the pictures.  Imagine my aversion to taking pictures of myself! But, well, I was enjoying the afternoon.  

So enough about me--back to today's accomplishments.  
I decided to create a teaching piece for a talk I'll give at our next guild meeting.  The subject is how I create my art quilts.  The second piece I worked on is an art quilt that will be completed in time to show at the meeting.  This piece is meant to help explain the steps that I use.  I decided to create three trees of the same general shape--each one in a different stage of completion.


The first section, on the left, shows my color palette, and the second shows the beginnings of my picture.  To show that I use any fabric that will work, I've included black netting, which I also use for shadowing.  I begin quilting the background when largest parts of the picture is in place, so I echo quilted around this section of the work.  Finally, I used white thread to stitch around every piece on the picture so that it will easily show.


In the third section I've quilted the background and begun adding some details.  Everything is "pinned" in place with stitches that will hold it down just enough to move the quilt from the long arm to the Bernina.  The details that are in this section are the bird nest, the squirrel hole, and the grass.


The last section shows the thread painting that I've added to finish the piece.  Notice how much thread painting I added to the detailed parts--the bird nest, squirrel hole, and grass. I spent maybe 15 minutes putting in all those stitches using the Bernina stitch regulator.  The only thing left is to bind the piece with black binding, which I like because it frames the artwork nicely.

Friday, November 22, 2013

Closing the barn door

The barn quilt is complete: binding and label attached and email sent to the customer.  Hopefully the delivery will take place in the next few days, because I may not want to let this baby go.  It’s quite pretty and I really like it, especially now that the painting and binding are finished.  I do need to take photos and I want to pick up a dowel rod to fit the length, but hopefully all of that will take place tomorrow.  


These photos are process photos from the beginning to end. 


Thursday, November 21, 2013

It's a Barn Raising

I’m almost finished with the Mayeux Barn Quilt that I’ve been working on.  It’s a mixed media piece based on a photo of a barn somewhere near where my grandparents lived.  I haven’t driven there to see the barn, although Rich and I think we’ve seen it in the past while driving around the parish.  


The structure is unusual for barns in our area.  It’s basically a straight-side, two-story structure with wings on all four sides. Also unusual is that it’s built off the ground like a house would be.


Making it was lots of fun, but I think my favorite part happened tonight while I was adding the paint.  I like to paint in the grass and soil.  

In this case the soil is reddish brown because the barn is on the banks of Bayou des Glaises.  As the bayou overflowed its banks, it left red sandy silt in the region. 


That red soil is rich for farming, but I know it from playing in the fields around my grandparents’ home.  In my memory the soil was always freshly plowed which made it cool and soft.  I’m pretty sure that our 100 degree days made it hard and hot for my bare feet, but I choose to remember the good memories.


Happy Quilting,
Mary

Sunday, June 9, 2013

Sunday Quilt Inspiration

For today's quilt inspiration, I thought I'd share my inspiration for this quilt, which I made for the studio.  I'm teaching an applique class a week from tomorrow and have decided to use this small piece as the inspiration for the class.  Each student is to bring a fat quarter and five inch square in a solid color.  I'll bring along a few more fat quarters, batting and iron-on fusible web.  


My plan is that we'll cut the fat quarter in half to make both the front and back for a small 9 X 11 quilt.  The solid color squares will be the pieces we'll cut for the applique.  Students can share with each other or use some of the fabric I'll bring to have some variety in colors.

One reason for using this piece is that there are at least three different applique techniques, making it a good example piece.


Another reason, is that I have both free-hand cut pieces and die-cut pieces, giving students the concept that both are options.


And the final reason: flowers.  We love flowers, so I figure I can't go wrong with them.  

So back to the beginning: inspiration....one place for inspiration is my own garden, another (easy to share inspiration) is Pinterest.  I often use Pinterest to look at individual flowers and to get ideas for unusual flowers.  

 While these two photos can't help much in figuring out how a flower is formed, they can help in determining which colors work well together and in figuring out arrangements.

I've found these photos useful in looking at how to place petals and stamens. 


And, of course, these have been useful in determining how to form flowers that dangle from a stem, although I didn't use that type of flower in the example quilt.


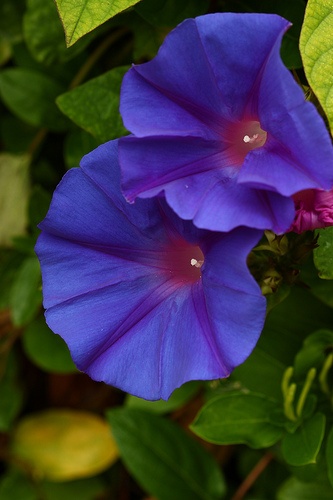
I just planted both cockscomb and morning glory in my yard, so I found photos of both to get an idea of how to make those flowers because it would be fun to include them in a future quilt. 
I hope that this helps you in finding inspiration and techniques for your own quilting.  Just remember that inspiration can come from anywhere, if you listen to that little voice in your head saying, "Hey pay attention."