Showing posts with label piecing. Show all posts

Wednesday, December 2, 2015

Improvisational Thoughts

Recently I've been quilting more using improvisation. I typically do a bit of research about a technique once I've used it a time or two. In this case, I've used it quite a few times and I've researched.  Sort of.  Meaning I read a few blogs, looked at quilts, and played with ideas that came to me while I was doing said research.


One of the things I've figured out is that improvisation means basically the same whether it's quilting, acting, or some other form of art. Thus, improvisation means to arrange or compose something without a plan in place. I think of improv as doing something with reckless abandon. Reckless meaning entertaining and abandon meaning no rules. 

In the case of acting, improv is to act "on the fly" or without a script.  When I taught speech, my students loved improv work. Two or three of them worked as team, playing off of each other. Generally, they pulled a topic from a hat and and began speaking and acting within 10 seconds.  One student began a dialogue and the others jumped in, trying to entertain the rest of the class. 

I have no doubt that an improv quilt class would be great fun, and I'm considering building a class for a local guild that would use some of the components that I used in my class to get students started.  In the meantime, I'm trying to play in improv, and I've been reading other blogs.

In one of my favorite blogs, Sew Slowly, Kaja recently wrote:
One of the things I have been reflecting on is that it often seems to be easier for people to work in an improvisational way when they are using scraps; cutting into yardage is somehow harder. I am as guilty of this as anyone - in fact one of my sticking points is often that I am trying too hard to preserve a fabric when I should be thinking about how to cut it. 

While reading her words, I started thinking about all of the fabrics that I have stashed aside.  Most of them are complete collections of a focus fabric and 10 or so coordinating fabrics. 

Unwilling to cut into the focus fabric, I put the whole set away. Certainly one can't separate a perfect collection!  And they have waited.  Oh, they are safe.  Safe from the person who loves them most!  Isn't there something wrong with the scenario?


Thank goodness I've begun pulling them out and using them.  It's been difficult, however.  I've pulled out two or three sets before deciding which one I'll chance. I've put one or two back after picking up the rotary cutter.  I will. I won't. I will.  I can't. I won't. I should.  I....  

I'm as bad as Hamlet trying to seek revenge. Claudius could sleep soundly if I were the one making the decision.

But I'm going to give up Hamlet's ways and make the decision to cut into my pretty fabrics.  No matter how difficult it may be.  No matter how nervous I get at the thought of cutting.  That's the hardest part. Cutting. 

Well, first there's the part where I have to decide on a pattern.  But using improv allows me to bypass that difficult decision and move right into the cutting part. Maybe cutting into the fabric is easier if there's no pattern decision. Just get to it.

That would be pretty awesome. Just make a cut.  Doesn't matter how big or small.  It can be straight or not.  It can be whatever it ends up being.  Oh, wow!  That sounds liberating.  Reckless abandon, indeed!

Friday, August 21, 2015

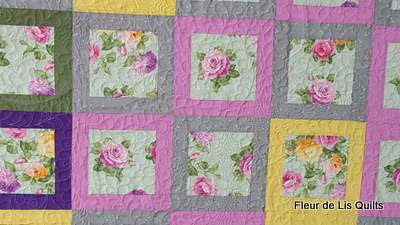
"Old Ohio Rose" ~~ finally complete!


Yes, that's right.  I've finally finished everything on "Old Ohio Rose."  Today we also had perfect weather for photographing the quilt.  It was calm and overcast when I got home from school, but I waited until Richard could assist, because the ladder is broken and very unsafe.  


His job was to make sure that it didn't do a split on me.  The problem is the little arm that connects the two uprights. One is completely missing!  


Now before you scream "UNSAFE" all hyper-loud, there's a new ladder.  It's just not here.  A son borrowed it.  Suffice it to say Rich may get another ladder for Christmas this year.  That would be two ladders in three years.  If I keep this up, in a couple of years everyone will have a ladder.  I may even get my own!


To avoid my climbing the ladder again, Rich pulled the quilt off the line, gently so the clothes pins wouldn't break.  He wanted me to leave them on the line, but I remembered that he has a grabber, which worked beautifully. 


 There's not much to say about "Old Ohio Rose."  It's a fairly simple quilt and it was a quick sew.  It took me a long time because I couldn't get into the studio.  I like it but I'll admit it's not my style so much, even though I bought the fabric.  My tastes have changed over the last few years, and I like the newer, modern fabrics much more now.


One could argue that growth and change are reasons to NOT build a big stash.  I suppose I should agree, but I love my stash and building it has been great fun.


Want to read more about this quilt?  You can find earlier posts in "Creative Saturdays" and in "Have Bernina, Will Travel."


The back is a pieced back made with fabrics from my stash.  I used a few small pieces that are on the front and added some solids and gingham fabrics in light pink that came from my mom's stash.  I really like the look!

Linking up with
Finish It Up Friday at Crazy Mom Quilts 

Saturday, August 8, 2015

Creative Saturdays


Creative Saturdays are the best, aren't they?  I definitely had one of those today.  


Firstly, I finished quilting "Old Ohio Rose" which I started back in June while we were on vacation.  I wrote about that in "Have Bernina Will Travel."  I pieced all the blocks on the trip and finished putting the top together after we returned home.  I did not decide on a design.  Nope.  Just threw all the blocks together and started sewing.  They landed where they landed!


Last weekend I loaded the quilt top on the long-arm and began quilting using an all-over feather design.  I added a few scrolls and a little echoing in places where I needed to fill in the background. Easy, fun, stress-free sewing and quilting.  The only thing left is the binding and label.  Yay!

I just love this pieced back!  Originally I planned to used this pretty pink stripe with small roses.  I think it is a coordinating fabric that goes with the line, but I could have found it at a different time and decided to put them all together.  Regardless, it goes well, but there wasn't enough for the entire back.


I pulled lots of pinks, some left over from the top and others from the stash.  I have gingham, a pink solid, and a pink with beautiful script from one of the lines that raises money for cancer research. 


After finishing the quilting, I decided to go to school for a couple of hours to work in my classroom.  I left a mess on Friday, too exhausted to do any more.  Today I managed to clean tables, hang paper "shades" to block out the morning glare, add pretty welcome letters, and put away some out-of-place items.  Tomorrow I hope to clean one of the storage rooms to put away the items that we hauled in from my old classroom.  It surely feels good to be back in the library even--if I don't get to play librarian.  

How did your creative Saturday go?

Monday, June 23, 2014

Basic Quilting Tutorial: PIECING

I promised to write a quilt tutorial for a reader who asked that I help her to get started with a small, easy quilt. Read that post here.
I'm publishing this now with the hopes that anyone who sees an error or has a suggestion or tip will chime in.  Email me at mary.marcotte@gmail.com and I'll add your ideas or make changes.


Chain stitching
I been think it's probably necessary to include a little of everything: basic piecing, applique, quilting, and finishing; but I've decided that to make things easy I should divide the tutorial into the four sections. Today I begin with piecing.  For the neutrals quilt that I'm working on, I cut four and a half inch squares. 

Any size squares will work, but I'm doing the math for the 4 1/2 squares.  Because I want this quilt to be a little larger than crib size, I've chosen to make 12 strips of 10 blocks each for a 40 x 48 inch quilt.  (Crib size is generally 36 x 40).

Once you have the 120 blocks cut, begin stitching by chain piecing the squares.  Put two squares together right sides facing and stitch the first pair, then get the second pair, make 2-3 stitches with no fabric under the needle, and slide the square under the needle.  Continue in this fashion until you have a long chain of pairs all connected by the thread.  Cutting them apart takes only seconds and your ready to begin the second chain. 

Snip the thread so the pairs are separated and you're ready to begin the next chain.  Open two sets of squares and place side by side.


When you sew the two sets together, you will get a row of four squares all lined up in one line.  You should sew up several of these.  For your first quilt, don't worry too much about keeping all the fabrics in a particular order...that can drive a girl nuts!  Instead, just have fun matching pairs and rows so that there aren't two of the same next to each other.  Eventually you'll have just rows of four.  


Repeat the process to get rows of eight.  But wait!  Don't sew everything into eights!  You need 10 rows of eight.  Then you'll add another four set to an eight set to make a row of twelve squares.  That's your goal, remember?  10 rows with 12 squares each.  

The easiest way to arrange your rows is to put them on a design wall, but arranging them on the floor or a large table works also.  First press the rows so that the seams are all going one way.  ONE way: all to the left or all to the right.  


Once they are pressed, begin placing them side by side making sure the seams now alternate directions.  The seams on row 1 go right, then the seams on row 2 go left and so on until all the strips are arranged.  This will match up the seams so that you will be able to stitch quickly and efficiently and the quilt will look neatly put together.  I put it all together then check the seams one more time because it's easy to get mixed up when moving the strips around.  

Now it gets interesting.  You have the strips in order but you need to get them to the sewing machine without mixing everything up.  This is what I do--keep in mind that you sew on the right side of the fabric--take the top strip and fold it down over the adjacent strip and pin.  The trick is to put the pin in the right place...at the top of the strip with the head of the pin pointing to the right side.  So take the strips in your hand as though you are going to put them under the needle.  Pin them together near the top and make sure the head of the pin is on the side that will go under the needle.  Your pin is always your way of knowing where to begin.


Now you're ready to arrange the next set of strips.  Ah, how do you keep them in order?  I number them.  A sticky will do, but I don't trust anything that is supposed to keep me in order, so the same pin holds the paper slips, tells me which way is up and which side to sew on.  Here they are all stacked neatly and ready to sew.  Notice that the pins are not in the way of the needle so that they can stay in the fabric while all the strips are sewn.

I don't pin anywhere else on the fabric.  Instead, I hold the strips together at the first seam.  Remember all that arranging so that seams are going in different directions?  Now it pays off.  Hold the first seams (seam allowance going away from each other) with your right hand and begin sewing at the edge going all the way into the seams.  Needle down, let the machine do the work of holding that seam in place while you catch the next one.  Again, seam allowances going away from each hold the seams and sew through the seam.  I let go of the seam when it's going under the presser foot.  (I'm not at all afraid of my machine...it's my friend!)


It takes a while for this chore.  There are six sets of long strips, but goodness it's beautiful when it's done.  Notice that I've moved my paper numbers to the front of the strips.  Now they are pinned near the seam that I just finished.  I won't move them again till the quilt is finished.  

Notice also that they are numbered backwards.  #1 is all the way to the right and #6 is all the way to the left.   That's correct!  Remember we sew on the right side, so I'll flip #1 to the left on top of #2 and pin.  #3 flips over left on top of #4.  And that leaves #5 to flip over left on top of #6.  I pin each one as I flip and place it on the other one and my pins tell me which end is the top; the pin head tells me which side I'm going to sew on just like before.  No other pins needed, I just sew exactly the way I did before: hold the seam and sew.  


At this time I leave the chain-stitches intact.  Since I always sew in the order of the numbers, the chain-stitching is just another way to make sure that I don't mix up the order of things.  Later, when you make a trip around the world or some other pattern that requires keeping everything in exact order, you'll be glad you've practiced this.

By the time you've finished stitching this set, you'll be ready for the final round.  Do it all over again, but this time you're working with three sets of four strips and, once you stitch the first two together, you will add the third set to it.  And you've got a completed quilt top!


Again, email me if you see an error or have a tip for our new quilters.  
Happy Quilting,

Friday, September 28, 2012

Nine Patch Plaid

Have you ever gotten some odd quilt idea into your head and wondered how well it would work in real life?  I do.  Pretty often, in fact.
First nine patch
 Most often the odd idea is just that--odd.  Odd enough that the outcome is tossed into the trash along with the idea.
Washed out first nine patch cut evenly into four pieces and turned
Sometimes, though, I hit pay dirt!  This week was one of those times. Which is good because I was using some nice Moda solids.  I wasn't too worried about wasting them, though, because I was cutting the pieces into large enough squares that they could be used for applique if the idea didn't work.

Second nine patch sewn
My idea stemmed from the disappearing nine patch design.  Except that I'd cut the original nine patch and add larger squares to form another nine patch.  
Thinner strips added to the second nine patch
 One cut led to getting really brave and cutting again.  This time I added thinner white strips that give a sashing feel to the top.


close up of quilt corner
Once I got to this, I liked the little quilt so much that I considered stopping.  But by the time I returned to the studio after work on Tuesday, I'd had another idea, but you'll have to wait for the next post.  It's a work in progress that is progressing slowly.  Students, papers to grade, and lesson plans tend to interrupt.  Luckily it's Friday and I have plans to spend the day in the studio, which means I can continue the experimental design.