Showing posts with label alterations. Show all posts

Sunday, December 9, 2018

Wedding dress finish!

My niece has a wedding coming up in a couple of weeks. Just before Christmas. So wedding  bells and Christmas bells will all be ringing. 

Anyway she contacted me with an alteration request. At the time the dress was too long, but in the weeks since she's lost weight, so the dress was also a little big. Just big enough to need a few tucks.

She drove the normally five hours in a torrential rain for this. The dress is well made with underpinnings and boning, and interfacing, and lots of other stuff all built in. However, the structure was such that the top of the bust gaped open and looked awkward. So we had an awkward conversation about those "big girls" and the likelihood that they would escape. It didn't take much convincing since, it turns out, she didn't know how to ask for help but had great concern. The irony!


I tried a couple of ideas: taking in the sides where the armseye would be, drawing in the center of the sweetheart shape, tightening the crisscross drawstring. Nothing made me happy. Either the gap shifted forward, the bust became too tight or I created bulges in odd places. 

Finally I suggested straps. Let's just try ribbon and safety pins. No harm no foul and maybe it will work. Well, lo and behold, that was the answer! She hiked up the dress, I pinned on some satin ribbon front to back and we hemmed and hawed. Then I changed the ribbon to create a halter top and we hemmed and hawed. Lastly I crisscrossed the ribbon in the back and the dress Behaved. With a capitol B, I tell you. Just like that the dress knew who was boss. And the big girls didn't look so nervous. 

So the white ribbon stayed pinned to the top and I tackled the hips. Just a tiny little adjustment took out one the finicky curve and we were in the business of finding a good hem length. I decided to cut an extra half inch off so that I'd have enough for my secret weapon.

After lots of measuring and two little panicky hot flashes, I cut and hemmed the dress. Then I used the pieces of fabric I cut off the hem to create the straps I needed for the top. Yes, there's always a place to steal fabric from the dress. This is my third time, so I know. (Alayna's dress is here.)

I didn't even sweat over the fact that there were curves in the fabric. Instead I let that work to our advantage and turned the straps so the curves are toward the neck and could follow the shape of the shoulder. That removes any stress or pulling against the shorter side of the strap and gives a snug, fitted look. Happy accidents are nice after panic stress. 

We tried getting the dress on with the straps pinned, but that was not happening, which meant I had to devise a way to remove the straps for dressing/undressing. A couple of little white buttons on the back side of the dress did the trick and don't show at all since they are on the inside. 
To make neat buttonholes, I added heavy interfacing to the end of the straps. It's going to take time to get this chick into and out of that dress, but she looks great when she's all buttoned and strapped and busted and SPANXed in. In other words, a typical wedding gown.

I don't have an it's-finished-and-it's-perfect picture for you. That picture will have to wait till the wedding. Since it's only two weeks away, you won't have to wait long. The bride-to-be is happily snoozing surrounded by unwrapped Christmas gifts in our spare bedroom. She'll leave tomorrow with a lovely, well-fitted gown that is much less likely to malfunction on the important day. In other words, a fabulous wedding gown.

Friday, March 17, 2017

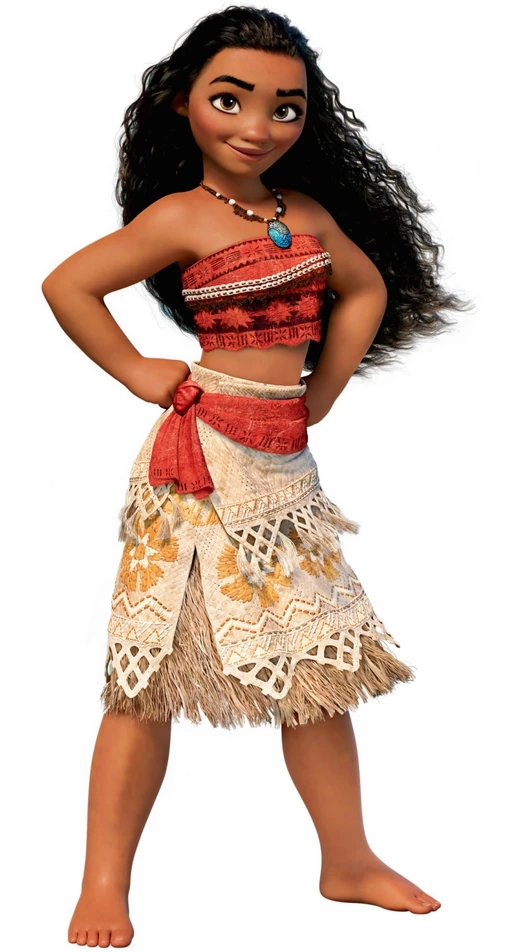
Moana costume reveal ~~ finish

Image result for Disney MoanaIn case you haven't heard, Moana is Disney's latest movie. I haven't seen it (although it's played in my house many times in the last week) so my knowledge is limited to this: It's about a Hawaiian girl. She's named Moana. 

Today she had a costume fail malfunction, and I fixed her top so that her upper half is not exposed. 

Here's the backstory: Jenny ran to Walmart for a few things this morning and, as she has only one child, she looked for a surprise for Marley. Lo and behold, there was a Moana costume. Even better: one size fits all! And on sale! It was meant to be. 

It turns out that one size does not fit everyone. The entire costume was too loose. But the top? Wow, the top was loose. Really loose. 

How about matching those fabrics?
 Grandmay to the rescue. I dug around in the oranges to find fabric that might work with the original color. Whip up a strap and done!  Okay, it did take a few several minutes to turn the narrow tube right side out. But I prevailed, stitched the straps on and helped Marley get in. I decided to make a halter-type strap because they remind me of the 70's halter tops we wore to the beach. Perfect, right?


Nothing exposed and no one spoiled...

Tiny finish though it is, linking up with 

Tuesday, November 1, 2016

Down a Size and Stash Report

If it seems that I've been working on lots of small projects, it's because that is exactly the case of my sewing lately. This time it's a pair of jeans that I bought recently. I hate trying on clothes, especially in stores, so I waited to get home to put these on.

Once we returned home, though, there were groceries to put away, a demanding little granddaughter, and several puppies needing attention. The jeans didn't get put on. 


Two days later I noticed the jeans in the closet. Richard had washed them and hung them up in the closet. Wow! What a sweetheart! Except, wait, I didn't know whether they fit. Oh well, I'd make them work. I'd have to since I could not return them any more.

They did not fit. And making them work? Well, that took much more work than I first imagined. The hips, crotch, and length all needed altering, but 30 minutes of sewing and testing fixed up most of the problems. 

They may not fit exactly as I'd like, but they are pretty close. Considering how large they were originally, I'm satisfied. Surely they will be more comfortable than when I wore them on Friday and had to keep hiking them up. 


I suppose it's a good thing that I'm not particular about my clothes. I prefer comfort over style, so getting these comfortable was my most important aim. Which is more important to you, comfort or style?

And drumroll please, this month's stash report brought to you by "Be It Less Than You Can" weightloss systems! So that you can be less than you are right now.  Yeah, yeah, get over it, already. There are no drums and no weight lost. Just an ordinary stash report with a few yards used in October, but not many.


Stash Report for October 2016
Additions and
Subtractions
Yards
Projects from stash
Projects in Progress
Used this month:
6.5
Baby Bunting
two scrap quilts
Added this month:
0
Yellow Chevron
Moda Noteworthy quilt
Used in 2016:
74½
various small projects
Quilty 365
Added in 2016:
41½

Saturday, October 15, 2016

Jenny's Skirt ~~ an alteration complete

Jenny bought a cute dress last week but waited to get home to try it on. It fit but she didn't like the feel or the look or something about the bodice. When you live with your personal alteration expert, you don't let an odd fit get in the way of what you want to wear. 

Jen peeled off the dress and promptly asked me to turn it into a skirt. A skirt. "Just make it into a skirt," she says, as though it's an ordinary thing to do. 

Of course, I don't make things easier for myself--smiling when a grand says, "Grandmay can make anything!" Or in this particular case, agreeing that turning a fitted dress into a skirt could be a possibility. 

I asked Jenny how much she paid, just to make sure I wouldn't be cutting into some expensive garment. It would not be returnable after my attempt. But she assured me "we" would be out only a few bucks if the worst happened.


A quick side note: the dress has a can-can slip! But it occurred to me that her generation may think that a can-can is a whole new idea.


I may have made entered the Sewing Hall of Fame by Jenny's estimation. Talk about pumped--for just a moment I thought she might strip down to her stepins, but she somehow contained herself. She slipped the skirt on over her sports shorts and did a happy dance in the middle of the kitchen with everyone around, laughing at her silliness. 

So how did I do it? It was actually quite simple: I cut the dress about two inches above the waistline, turned down the cut edge to make a casing (instead of a waistband) and finished off the zipper. Really, it was that easy and didn't take much time. 


I considered making a real waistband using the cut-off bodice, but the skirt has this little pointed dip in the front, and that concerned me. I went the safer route. Luckily, it all worked out once I fixed the zipper and added a hook and eye. I even had the forethought to take lots of pictures while stitching on the hook and eye. I'll write a tutorial for that later in the week. In the meantime, have a wonderful rest of the weekend and I'll see you tomorrow for Sunday Quilt Inspiration.

Friday, September 2, 2016

More studio cleaning


You know how yesterday I wrote about my messy worktable? Well, I returned to the clean-up today and advanced a little bit.


The small project on the left is an organizer for Dusti's car. I cut it out from the leftover fabric that we used when we updated her sun visors so it will match. I intend to put a strap on it so that she can hang it on the back of the seat.  I'll use Velcro as a fastener so she will have some choices in where and how she uses it.


In another spot I had two tops that needed altering for a friend. They were advanced to the front of the line and are now complete. In fact, I put them in the car to return on Tuesday. I just needed to shorten the bottoms and sleeves.  Done and done.


Wow! I should have gotten to this cleaning business sooner! Somehow it all ran smoothly and quickly. So I folded some fat quarters and put those away. Tomorrow I plan to tackle the big pieces of fabric that I'd pulled for the last few quilt projects. That will take more time, but then I'll be able to see across to the other side of the table. I haven't able to do that in a while!

Finally I'll figure out what to do with those items that don't really have a home. That's always a difficult decision for me. My studio is full, so finding a space for new stuff is not easy. Plus, I tend to forget where I've put things, so I need to reason through the process.  

And then I'll be ready to get that big quilt finished! Wasn't that the goal at the beginning?

I'm linking up some of my recent finishes with Crazy Mom Quilts. Now that Amanda Jean is back from her 
mini-vacay, there will be lots of blogs to catch up with.

Thursday, December 17, 2015

Alterations and Preparations

I've been working on a twin size quilt, some small projects, and a couple of alterations.  None of those projects are for me, of course. The quilt will eventually be for a grand, the small projects are Christmas gifts, and the alterations for others.  I don't have pictures of the cute little dress for a little granddaughter, but I do have a few photos of the sweatshirt that I altered.  Because I had to get creative with this one, I thought I'd share my process.


A co-worker bought a sweatshirt from one of the sport teams at school but the sleeves were much too long.  It was easy to figure out how much to cut off, but once we did, I realized I didn't have any pins to hold it in place.  


Paperclip to the rescue.  It worked well until I wanted to remove it. I had to open it up and hold the sharp edges away from the fabric.
The original fleece sleeve had some stretch to it and I wanted to keep that, so I decided to add a sew-in elastic and use a knit stitch that would allow some stretch beyond what the elastic affords.
That stitch looks a little like this.  The seam begins on the left, takes two straight stitches, then one back-stitch just barely off to the side, then a fourth stitch that brings the needle back to the center.  It's the back-stitch that allows the thread to move with the stretch of the fabric.


The end result of the alteration is a neat sleeve that is the same size as the original.  That was important because I had to cut off about four inches which left the cut edge very wide. I didn't really want to alter the arm seam because I was afraid it would make the sleeve wonky and uncomfortable.  


The picture shows the new sleeve on the left and the old sleeve on the right.  Notice that they are almost the same width but the new sleeve has some shape from the elastic.


My friend was satisfied with the alterations, and I figured out how to make some odd improvements while keeping comfort in mind. Since she will be wearing this sweatshirt at work, which can be stressful, it seems extra important that it be comfortable.


And another Bunkie New Tech High School fan will be cozy and comfy when the cold weather hits in a few days.


Since this is a finish, I'm linking up with 
(who shared two cute finishes of her own)
Confessions of a Fabric Addict
(two finishes here, also)

Tuesday, October 20, 2015

Alayna's MORP Dress


Last week our granddaughter Alayna called and asked for help with a MORP dress.  I knew I was getting into something serious, but little did I know that it would mean changing the design of the dress.


I should have known.  I tend to get into these situations easily.  But who can say no to, "Grandmay, please."  Not me, apparently.  So they arrived late that evening for a fitting, giving me a couple of days to I could figure out the problem and start considering some solutions.  


The dress was just too big.  When her mom ordered the dress online, she had to measure Alayna.  Scared of getting a too-small dress, she was generous with her measurements.  


I would think it was a half-size larger than needed in the bust-line and back.  The halter straps on the bodice were much too long, but there were a couple of hooks so they could be adjusted.

I realized that the straps could be the solution if I could just figure out how to change them to regular straps that would hook in the back. So that's what I did--I moved the straps.  


Instead of a halter top, she now has a dress with straps that connect to the back.  Since the straps weren't long enough to reach the bodice back, I made slim little bands using cording and slivers of fabric stolen from one of the side seams.  Since the dress is covered in chiffon, I had no choice but to treat it with extra care.  I sewed everything before cutting and used fray check to help control the fraying on the little cords.  


I had to hand sew the cord ends onto the back, then attached it to the wider straps.  There are lots of beads on the straps, so I didn't want to fold them under and have them pinching and pricking her skin all night.  I also didn't want to cut the cord and risk messy ends sticking out.  I certainly did not want to take any stitches out!  


So I chose to hand-stitch the cord to the strap from one edge to the other. It worked very well!  To give them a finished look, I added some beading on the small corded bands.  The beads don't match exactly, but they are close enough that even Alayna thought I'd somehow found matching beads.


They returned on Thursday to pick up the dress, redesigned, finished and pressed.  A boxed ride from the manufacturer to Louisiana is pretty rough on an evening dress, so it needed a little TLC in the form of my little steamer.  Alayna seemed very pleased: for a young lady who is very quiet and shows little emotion, she was downright giddy with happiness!  Go Grandmay!  


Quick update: I saw Alayna this afternoon and asked about her dance.  Her reply, "Awesome!"  And the dress straps held up (I was a little concerned).


Linking up with lots of parties tonight!
How I managed to catch them all is beyond me.

Finish It Up Friday at Crazy Mom Quilts