

I made this one before going to Marley's birthday party. I put a loop on the back so that it can be worn on a headband. Not bad for a first one, I suppose.
 After we got back home and had supper, I ran out to the studio for a while and decided to play a bit more.
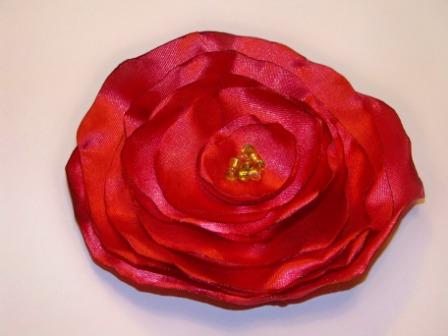
I decided to try a red, since Christmas is not far away, and in the process, figured out a few things. For starters, I definitely like the rippled effect rather than the flat flowers I've seen in some photos.

I also like the beaded stamens that I added to the last few. They have a 3D effect and, although it takes longer, I can make several loops like the stamens in the purple one that I made.
And, finally, I really like the black netting.
I've decided not to include netting on all the flowers because some moms probably won't want the netting on flowers for their little ones.
 It does add a more grown-up look to the flowers. Some I will put on pin backs so customers can pin them to purses, jackets, dresses and so on. Others I'll simply put on loop backs so they can be worn on headbands, looped onto ponytail holders, or bobby pins.
My hope is that they'll sell at the Arts and Crafts Fair in Natchitoches in December. I suppose if I make a few more, I'll have the system down and will be able to make them a little faster. As it is now, it's taking me quite some time to make one or two. But there is a learning curve to overcome.
No comments:
Post a Comment