
 I finished a quilt today (yay!)
and as I was sewing the binding on, it occurred to me to take a few pictures while working and write a tutorial on my process. I'm fairly sure there's not much new here. However, in case you're curious, need to know about bindings, or should your brain work in a kooky way, here it is.
I finished a quilt today (yay!)
and as I was sewing the binding on, it occurred to me to take a few pictures while working and write a tutorial on my process. I'm fairly sure there's not much new here. However, in case you're curious, need to know about bindings, or should your brain work in a kooky way, here it is.
Begin by deciding whether you will attach the binding completely by machine or hand-stitch it to the back.
 |
| 1 |
I chose to sew the binding on completely by machine, so I began by sewing it on the back of the quilt first. However, if you plan to hand-sew the binding, you will machine sew it to the front of the quilt, then turn it to the back before hand sewing.
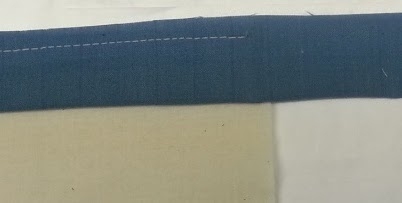
Press the binding before attaching by folding in half on the length with the wrong sides touching. Pin the binding to the quilt along one edge beginning in the center of one side. Do not sew the first five inches of the binding. You will need this to attach to the opposite end of the binding later on. Begin attaching the binding using straight stitching.
 |
| 2 |
 |
| 3 |
Sew along the first edge until you reach the first corner, stopping 1/4 inch from the second side and remove the quilt from the machine (2). It's not necessary to clip the threads; I've done that simply so they don't show in the photo.
Turn the binding up to form a 45 degree angle and place a pin in the binding to hold it in place (3).
 |
| 4 |
 |
| 5 |
Turn the binding down on itself to lie along the right edge of the quilt (4). Again put pins in the binding so that it will stay in place as you move it back to the machine.
Begin this stitch 1/4 inch from the edge (5). Backstitching is not necessary since you will make another seam later.
 |
| 6 |
In photo 6 I'm holding the binding so that you can see how loosely it appears in the corner. This necessary to make a mitered corner on the opposite side.
 |
| 7 |
Repeat the process as you work completely around the quilt. When you get to the first side where you began, stop about 12 inches from the beginning stitch. This is the part I call "closing the binding." You will need to measure and connect the binding ends to finish stitching it to the backside of the quilt.
 |
| 8 |
Lay the two binding ends down along the quilt edge so that the shorter one is on the bottom. Mark on the top piece exactly where the bottom piece reaches, measure from this line 2 1/2 inches of overlap and mark. Note: this measurement must equal the width of your binding. If you use a narrower 2 1/4 inch binding, the measurement must match 2 1/4 inches.
 |
| 9 |
Photo 9 shows the binding with the tape measure removed so that you can easily see the lines.
 |
| 10 |
Cut on the second line that you drew (10).
 |
| 11 |
 |
| 12 |
Quick Tip: Fold the quilt as I do (11) this will keep it out of your way and make it easier to sew the binding.
To sew the two ends together, match them with right sides together so that they form an L shape. Quick Tip: pinning the fabric in this way (12) will keep them out of your stitching path as you sew.
 |
| 13 |
Draw a 45 degree line between the pins from corner to corner.
 |
| 14 |
Photo 14 shows the two pieces split apart so you can see how they should overlap.
 |
| 15 |
 |
| 16 |
Sew directly on the line from corner to corner.
Photo 16 shows the binding after stitching. You'll cut 1/4 inch from the seam, as in photo 17.
 |
| 17 |
 |
| 18 |
The second side is easier to stitch. These directions are for machine stitching the binding onto the front of the quilt. Turn the quilt over and roll the binding around to the front. Begin somewhere in the middle of a side and sew until you are about four or five inches from a corner.
 |
| 19 |
 |
| 20 |
 |
| 22 |
There we are--a beautifully mitered corner and a beautifully bound quilt!
Finally, let me give credit to Michele D'Amore for her beautiful collection of Surf and Sand fabrics, which is from Marcus Brothers Textiles.
Happy Quilting,
Mary
2 comments:
I always struggle with closing part. I see it getting done and I always fumble on that. I bookmarked your tute so I don't forget.
Another great tutorial, Mary! Yes, a bookmark is in order here.
Post a Comment